Showing posts sorted by relevance for query dolls are everywhere. Sort by date Show all posts

Thursday, May 12, 2016

Julie Nutting Dolls are Everywhere Challenge


Dolls are everywhere challenge.....Where will your doll go?

Julie Nutting is hosting a fun new challenge.  We'd like for you to take your dolls everywhere you go and then show us all those places.  

Take the doll to the store, to the park, to the zoo, on a walk, to the beach, to the cafe, out for tea, or even on vacation with you.  This challenge will run all summer long...so plenty of opportunity to take the dolls out on the town with you and wherever you go.  

We just want to see how much fun your dolls are having.  
Post your dolls to the Facebook groups: Julie Nutting Paper Dolls and Other Fun Stuff  and Julie Nutting Doll Club and a bonus if you tag on instagram @julie_nutting


This is my doll....it does NOT represent me...just sayin.  I do not own an eye patch.  
This is in front of the ships in St Augustine.  Arggggggggg.  


How did I make this?  
I used these two dolls:  Tommy and the clothing from Adam.  The I printed a pirate hat, eye patch and belt from the internet and sized them to fit.  I added my own red ribbon belt and head band. 


To add to the fun, I wrote some fun lyrics that you can sing to the tune of Johnny Cash's song "I've Been Everywhere"
Dolls are everywhere, friend
Worldwide love affair, friend
Posted here and there, friend
Try a stamp I dare, friend
You'll be hooked I swear, friend
Dolls are everywhere

Dolls are everywhere, friend
Color in the hair, friend
Change up what they wear, friend
So much fun I swear, friend
Join the love affair, friend
Dolls are everywhere

Dolls are everywhere, friend
In the market square, friend
Circus, Park, Beach chair, friend
France to Delaware, friend
With creative flair, friend
Dolls are everywhere 

Saturday, May 28, 2016

Prima's Julie Nutting Dolls Are Everywhere - Eileen Hull Suitcases


Julie Nutting's Dolls ( from Prima) are EVERYwhere! and popping up in even more places...


The Dolls are Everywhere challenge continues.  You can find the original post and challenge right here.  

We've had dolls being posted in front of craft stores "shopping for clothing" ( Julie McGivern Vincent‎), dolls going for boat rides (Toni Samskar
 

Julie and the Design Team thought it would be fun to get our favorite Prima dolls ready for vacation. Summer, after all, is right around the corner! Maybe in your area, you are already experiencing the start of summer vacation from school. 

We used the Eileen Hull suitcase die #657124 from Sizzix to get our creative juices flowing.  I decided to use Gina and give her a vintage look with an old worn suitcase and mount onto an 8x8 canvas.  Gina is one of Julie's new designs.  You can find a great selection of Julie's products here.  


I thought I'd take a few shots that show the dimension and depth of the piece.  

Isn't Gina adorable? 


Visit Julie Nutting's blog to stay on top of the newest doll designs.  She's got some funnnnn stuff coming out soon. 

 To join the Dolls Are Everywhere challenge, just take a photo of your doll in front of some place special - going on vacation?  Take the doll too.  She'd love to join you.   Going grocery shopping?  Dolls love to shop.  Going to the park?  You bet dolls love a day at the park.  

After you snap a photo, post your creative shot to one of our Julie Nutting Facebook  doll groups.  They can be found here: Julie Nutting Paper Doll and Other Fun Stuff or Julie Nutting Doll Club.  

I can't wait to see where your doll turns up.

Products Used:  
Prima, Julie Nutting Doll Stamp Gina - 911379
Prima Soft Matte Gel Medium 961428
Prima Stencil 584641
Prima Finnabair Mechanicals Star 963354
Prima Color Bloom Mist ( on Suitcase)  - Antique Gold 573843
Eileen Hull/Sizzix Scoreboard XL Die- Suitcase/Bag  Die 657124
Paper - Maja Design Life by the Sea collection
Ranger Archival Ink - Black
Ranger Tim Holtz - Vintage Photo Distress Ink
Ranger Tim Holtz - Faded Jeans Distress Ink
Wink of Stella Clear
Clearsnap - Mixd Media Inx - Vintage, 


Tuesday, October 15, 2019

Halloween Pumpkin Home Decor - Buttons Galore and Prima/ Julie Nutting Doll Stamps - Instructions


DIY Halloween Home Decor   

Do you love to decorate for Halloween?   I love Halloween but I tend to lean to the cute side of the holiday and not the super creepy, frightening.  I was never a fan of scary movies.  

I have a home decor project  that you can make to "wow" your Halloween guests. Scroll down for the DIY instructions and helpful tips. 

So let's see how I transformed this simple Styrofoam pumpkin into a sweet Halloween centerpiece for your table with products from Buttons Galore, Prima and Julie Nutting doll stamps.   
Buttons Galore


Step 1.  Get a Cheap Styrofoam Pumpkin

First step is to use a super cheap Styrofoam pumpkin (about 6in tall) that you can cut up without tears.  The solid plastic pumpkins will not work.  

  Cut a wedge into the pumpkin to use as a "shelf" for the dolls and embellishing decorations. This will act like a shadow box or a pumpkin shelf.  


       Step 2.  Paint and Seal the Styrofoam.  
After you are successful and happy with your cutting job, you need to seal the exposed Styrofoam so it  doesn't continue to shed it's nightmare of devilish white static cling balls everywhere.  

 I painted the shelf of the pumpkin with black acrylic paint. After AIR drying completely, I  added an additional layer of ModPodge - gobs actually.  Gobs of ModPodge.  (You can use white school glue and water mixture as well).  This step needed to also AIR dry. 

WARNING..WARNING....WARNING  -  DO NOT use the heat gun to help dry the styrofoam.  This needs to air dry.  Go bake some brownies, take a nice walk and admire the leaves, start a new project, go to bed...anything other than use the heat gun.  It's better than calling the fire department.  
Step 3.  Making the Styrofoam Spooky
After the black was dry,
 I covered the pumpkin shelf with black cheesecloth that I grabbed at the dollar store (buy a decoration with black cheesecloth and rip apart if you want.) 

In the photo below, you can see the white ModPodge gobs are not dry yet but that is OK because it is a glue-like substance and will help to secure  the cheesecloth. 

Step 4.  Making the Dolls Sturdy for Home Decor Pieces
My main decorations are stamped dolls from Prima - Julie Nutting - Halloween - Cling Mounted Stamps - Catgirl .  
Prima - Julie Nutting - Halloween - Cling Mounted Stamps - Catgirl

 Like I mentioned earlier, I want this project to be like a shadow box with cool depth and dimension.  Thus my dolls can't be flat. They certainly cannot be flimsy and  vulnerable to folds and creases, rips and tears.  

To make her sturdy and durable,  I simply cut 2 or 3 doll shapes.  I decorate one to be used as the front.  I add some wood skewers and then add then glue the remaining layers to the back.  No need to decorate the back layer.  It will be facing the pumpkin.  
The wonderful thing about Styrofoam is that it provides a supportive medium for your dolls to stand up.  I  did add some glue to the ends of the wood skewers before sticking the dolls into the pumpkin.  
 Step 5.  The Shaker Sign Embellishment
The shaker sign is created much the same way the doll and cat were created - by using wood skewers under the layers of paper.  The wood skewers will be handy to stick into the top of the pumpkin to hold the Halloween shaker sign secure.  

The black cheesecloth was used to help provide a clean finished look to the shaker. 

The shaker mix is from Buttons Galore and I thought the mix was cute for this fun home decor piece.  
*********************************************************************************

Happy Hauntings 3D buttons
orange crush
 Buttons Galore and More -3D Buttons - Witching Hour HH100


*********************************************************************************

As you can see in the image below, I topped with Buttons Galore and More -3D Buttons - Witching Hour  and Happy Hauntings 3D Buttons


Now you can decorate as you desire.  I actually kept  the embellishments simple.  I used some generic pre-wired floral vines for the background.  The wires were perfect for poking into the Styrofoam pumpkin.  Add a dab of glue and all is great.  


One last finishing tip...I had some brown floral tape handy so  I did  wrap the stem in brown tape.  It looks a whole lot better wrapped in brown floral tape than just the original brown plastic.  


And this is  how the back looks.  For once, the back of my project is as pretty as the front.  wow ....that NEVER happens.  

Thanks for stopping here today.  I appreciate your visit. 


Shop Here:
*********************************************************************************

Happy Hauntings 3D buttons
orange crush
 Buttons Galore and More -3D Buttons - Witching Hour HH100

*********************************************************************************
Prima - Julie Nutting - Halloween - Cling Mounted Stamps - Catgirl


Buttons Galore

*********************************************************************************

Sunday, October 2, 2016

DIY Halloween Home Decor - with Julie Nutting

Time for some  DIY Halloween Home Decor - with Julie Nutting  

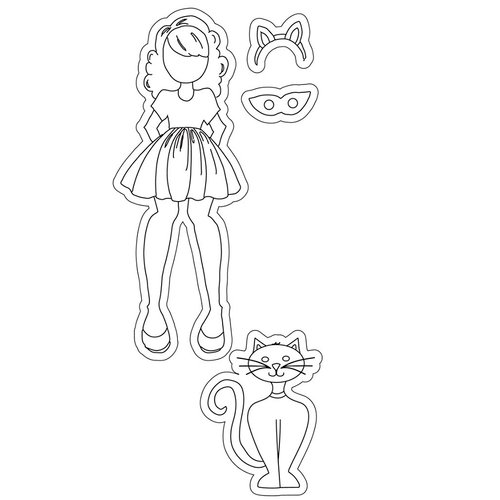
Julie Nutting and Prima have some very darling dies out for Halloween.  This  project features "CatGirl". She is ready for Halloween in her costume and with her cat by her side.   

I have a home decor idea that can be made on the super cheap.  The DIY instructions are listed down below, along with my helpful tips. So let's see how I transformed this simple styrofoam pumpkin into a sweet Halloween centerpiece for your table.   

The side view provides you with a great perspective of the project and really conveys my plan for using the pumpkin as a type of shadow box or shelf.  
 

Step 1.  Get a Cheap Pumpkin

First step is to use a super cheap pumpkin.  
I started off with a styrofoam pumpkin that I bought on the cheap - 50% off with an additional coupon.  Yippee.  I knew I was going to be cutting it and needed something super cheap that didn't make me sob like a baby if my project was an utter failure or the pumpkin crumbled into a styrofoam mess.    

I also made sure I grabbed a pumpkin that wasn't too large for the same reason above plus more.  Big pumpkin = big mess or big flop - maybe even both...big floppy styrofoam pumpkin guts all over my floor.  Oh my gosh - those tiny wretched styrofoam balls create static cling and it's impossible to get styrofoam off clothing AND cat/dog fur.    .  

The pumpkin I chose actually had a nice outside crusty shell which seemed to hold the shape perfectly even after I cut into it.  

I used my kitchen knife paired with a craft knife.  Probably not the best for my kitchen knife BUT what's done is done.   I cut a wedge into the pumpkin to use as a "shelf" for my dolls to be placed.  I am actually using this pumpkin like a shadow box or a pumpkin shelf.  


       Step 2.  Paint and Seal the Styrofoam.  
After you are successful and happy with your handy cutting job, you really need to consider some way to seal the exposed styrofoam lest it continues to shed it's nightmare of devilish white static cling balls everywhere.   OK you get the picture. 
 Plus you won't be able to preserve the project very well for future display unless you tackle this beast right here and now.  I painted mine with Prima's Glossy Black Gesso - which acts as both a sealant and a paint.  After AIR drying completely, I wasn't really satisfied.  I still thought it was too fragile and would still crumble apart so I added an additional layer of ModPodge - gobs actually.  Gobs of ModPodge.  (You can use white school glue and water mixture as well).  This step needed to also AIR dry. 
WARNING..WARNING....WARNING  -  DO NOT even think about pulling out that heat gun to help speed up the drying process UNLESS you have a spare pumpkin nearby and a "burning" desire to start all over.  No Pun intended.  LOL
But seriously folks - this needs to air dry.  Go bake some brownies or take a nice walk and admire the leaves.  It's better than calling the fire department.  
Step 3.  Making the Styrofoam Spooky
After I painted, I was still scrunching my face in disapproval.  It looked OK - clean and crisp however it also looked like painted styrofoam.  Not a quality look.

 I covered the pumpkin shelf with black cheesecloth that I grabbed at the dollar store.  I cannot be entirely sure about this - because I've never tested my theory, however I'm going out on a limb to and say that this is the only time of year you are gonna find black cheesecloth so go to the dollar store and buy a few bucks worth of stash. 
(You can also dye regular white cheesecloth  with black ink or mist.  Just toss in a baggie and add your coloring. )  

In the photo below, you can see the white ModPodge gobs are not dry yet but that is OK because it is a glue-like substance and will help to secure  the cheesecloth. 

Step 4.  Making the Dolls Sturdy for Home Decor Pieces
 Like I mentioned earlier, I want this project to be like a shadow box with cool depth and dimension.  Thus my dolls can't be flat. They certainly cannot be flimsy and  vulnerable to folds and creases, rips and tears.  
This one time at Halloween that RIP doesn't mean "Rest in Peace".  It means " you ripped your doll and now you need to start the dang doll over"  because she's lost an appendage or some such other misfortune.  Not good.   
To make her sturdy and durable,  I simply cut 2 or 3 doll shapes.  I decorate one to be used as the front.  I add some wood skewers and then add then glue the remaining layers to the back.  No need to decorate the back layer.  It will be facing the pumpkin.  
The wonderful thing about styrofoam is that it provides a su[pportive medium for your dolls to stand up.  I  did add some glue to the ends of the wood skewers before sticking the dolls into the pumpkin.  
 Step 5.  The Sign Embellishment
I'm not too sure I need to add too much detail here.  The wood skewers will be handy to stick into the top of the pumpkin to hold the halloween sign secure.    i did paint the skewers black for added camouflage.  
Now you can decorate as you desire.  I actually kept  the embellishments simple.  I used some generic pre-wired floral vines for the background.  The wires were perfect for poking into the styrofoam pumpkin.  Add a dab of glue and all is great.  


One last finishing tip...I had some brown floral tape handy so  I did  wrap the stem in brown tape.  It looks a whole lot better wrapped in brown floral tape than just the original brown plastic.  

And this is  how the back looks.  For once, the back of my project is as pretty as the front.  wow ....that NEVER happens.  
Enjoy and thanks for stopping.  

This piece is available in my ETSY shop - while available.  You can find the direct link right here.   I'll be adding a few other Julie Nutting  Halloween pieces in the next few days so keep watching.  

Supplies:
Prima Julie Nutting Doll Stamp - Cat Girl 911638
PhotoPlay Papers - Bootiful Collection -Sticker Set - Elements bt-2312
Styrofoam Pumpkin
Graphic 45 - - Birdsong Collection Tranquility 4500573 - Dolls Dress - orange layer
Graphic 45 - Halloween in Wonderland - You're Late 4500252 - Creen layer of dress
Graphic 45 - Halloween in Wonderland - Wonderland Classified - 4500247 Polka Dot layer of dress
Graphic 45 - Halloween in Wonderland
Prima  Art Basics -Glossy  Heavy Black Gesso 962968
Mod Podge - Matte
Craft Knife
Black Cheesecloth