

DIY Halloween Home Decor
Do you love to decorate for Halloween? I love Halloween but I tend to lean to the cute side of the holiday and not the super creepy, frightening. I was never a fan of scary movies.
I have a home decor project that you can make to "wow" your Halloween guests. Scroll down for the DIY instructions and helpful tips.
So let's see how I transformed this simple Styrofoam pumpkin into a sweet Halloween centerpiece for your table with products from Buttons Galore, Prima and Julie Nutting doll stamps.

Step 1. Get a Cheap Styrofoam Pumpkin
First step is to use a super cheap Styrofoam pumpkin (about 6in tall) that you can cut up without tears. The solid plastic pumpkins will not work.
Cut a wedge into the pumpkin to use as a "shelf" for the dolls and embellishing decorations. This will act like a shadow box or a pumpkin shelf.

Step 2. Paint and Seal the Styrofoam.
After you are successful and happy with your cutting job, you need to seal the exposed Styrofoam so it doesn't continue to shed it's nightmare of devilish white static cling balls everywhere.
I painted the shelf of the pumpkin with black acrylic paint. After AIR drying completely, I added an additional layer of ModPodge - gobs actually. Gobs of ModPodge. (You can use white school glue and water mixture as well). This step needed to also AIR dry.
WARNING..WARNING....WARNING - DO NOT use the heat gun to help dry the styrofoam. This needs to air dry. Go bake some brownies, take a nice walk and admire the leaves, start a new project, go to bed...anything other than use the heat gun. It's better than calling the fire department.

Step 3. Making the Styrofoam Spooky
After the black was dry,
I covered the pumpkin shelf with black cheesecloth that I grabbed at the dollar store (buy a decoration with black cheesecloth and rip apart if you want.)
In the photo below, you can see the white ModPodge gobs are not dry yet but that is OK because it is a glue-like substance and will help to secure the cheesecloth.

Step 4. Making the Dolls Sturdy for Home Decor Pieces
My main decorations are stamped dolls from Prima - Julie Nutting - Halloween - Cling Mounted Stamps - Catgirl .
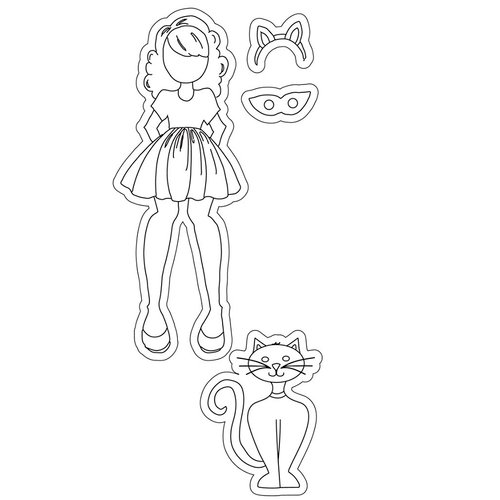
Like I mentioned earlier, I want this project to be like a shadow box with cool depth and dimension. Thus my dolls can't be flat. They certainly cannot be flimsy and vulnerable to folds and creases, rips and tears.
Like I mentioned earlier, I want this project to be like a shadow box with cool depth and dimension. Thus my dolls can't be flat. They certainly cannot be flimsy and vulnerable to folds and creases, rips and tears.
To make her sturdy and durable, I simply cut 2 or 3 doll shapes. I decorate one to be used as the front. I add some wood skewers and then add then glue the remaining layers to the back. No need to decorate the back layer. It will be facing the pumpkin.
The wonderful thing about Styrofoam is that it provides a supportive medium for your dolls to stand up. I did add some glue to the ends of the wood skewers before sticking the dolls into the pumpkin.

Step 5. The Shaker Sign Embellishment
The shaker sign is created much the same way the doll and cat were created - by using wood skewers under the layers of paper. The wood skewers will be handy to stick into the top of the pumpkin to hold the Halloween shaker sign secure.
The black cheesecloth was used to help provide a clean finished look to the shaker.
The shaker mix is from Buttons Galore and I thought the mix was cute for this fun home decor piece.
*********************************************************************************
As you can see in the image below, I topped with Buttons Galore and More -3D Buttons - Witching Hour and Happy Hauntings 3D Buttons
The black cheesecloth was used to help provide a clean finished look to the shaker.
The shaker mix is from Buttons Galore and I thought the mix was cute for this fun home decor piece.
*********************************************************************************
 |
|


*********************************************************************************
As you can see in the image below, I topped with Buttons Galore and More -3D Buttons - Witching Hour and Happy Hauntings 3D Buttons

Now you can decorate as you desire. I actually kept the embellishments simple. I used some generic pre-wired floral vines for the background. The wires were perfect for poking into the Styrofoam pumpkin. Add a dab of glue and all is great.

One last finishing tip...I had some brown floral tape handy so I did wrap the stem in brown tape. It looks a whole lot better wrapped in brown floral tape than just the original brown plastic.

And this is how the back looks. For once, the back of my project is as pretty as the front. wow ....that NEVER happens.

Thanks for stopping here today. I appreciate your visit.
Shop Here:
********************************************************************************* |
|
*********************************************************************************
|
*********************************************************************************
No comments:
Post a Comment