Showing posts with label DIY home decor. Show all posts

Wednesday, June 9, 2021

Light House Canvas - DIY Home Decor with Creative Embellishments


Welcome to the ocean. The ocean is my happy place and I adore creating a variety of coastal projects to keep me as close as I can be to my favorite place.  

Creative Embellishments has a large selection coastal themed products to help with card making, home decor, traditional memory keeping,  scrapbooking, and any crafty idea you can imagine.

Today's feature is an easy  DIY home deco canvas made using Creative Embellishments Wooden Home Decor - Lighthouse and embellished with Creative Embellishments Seagull Set and Starfish and Sand Dollars


The wood wooden Home Decor - Lighthouse  piece is fairly large (4.2" wide and 12" tall ) so I selected an 8"x 10" canvas for the project.  The paper background is a sheet of patterned paper from Stamperia's Sea Land 12x12 collection. It's also the backing behind the wood light house.  

I think I am on my 4th reorder of this gorgeous collection.  

I used a sea sponge and dabbed the wood light house with white  and light blue acrylic paint - but did not cover the whole piece. I tried to achieve a weathered look - not full coverage.    Tip:  if you find you have "over painted", just take some sand paper to the wood and ruff it up a bit.  You'll get it back to sea worthy perfection in no time.  


Sunday, February 14, 2021

Angel Shadow Box DIY Home Decor with Shaker - Instructions


Hello.  Happy Valentines Day!

Today I'm sharing my version of a very untraditional DIY Valentines home decor project.  Hmmm how so?  Well this was created for my little Granddaughter's room.  My first grandie is 7 months old and in this day of Covid, we have not gotten the opportunity to spend as much time with her as possible.  Sadly she moved 1000 miles away last week.

That is why this is a Valentines piece - made from my heart for my little loved one.   Of course the added spin to this is that I used  some of my favorite chipboard pieces AND added a shaker ( which I love making).

Scroll down and you can see the DIY tips and instructions for creating a home decor shadow box. 

Here are the chipboard pieces used in this shadowbox: Creative Embellishments Star Shaker set  and Girl Word Set.  The Star shaker set was simply painted with cream acrylic paint.  The chipboard words were embossed with Ivory Aged Embossing Enamel  from Stampendous.


Ivory Aged Embossing Enamel .60oz - Stampendous


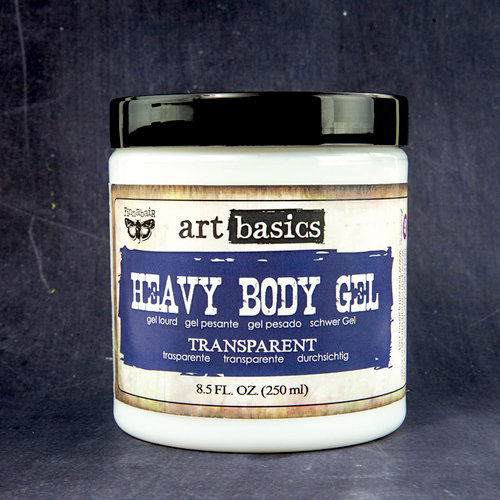
No shaker is complete without fabulous shaker mix.  I used Buttons Galore's new Shaker Mix in a Cube- Spring Blooms.  I added the mix to the shaker, obviously, but I also added it to the bottom of the shadow box using matte gel medium, such as Prima's Art Basics - Heavy Body Gel as an adhesive.

Buttons Galore -Spring Blooms Ll547Prima - Finnabair - Art Basics - Heavy Body Gel - 8.5 Ounces


Tips and Techniques

The wood frame used for the shadowbox was really a table top home decor piece on clearance at Michaels.  I am flipping it around and using the backside of the piece.  The wood frame is perfect because I can add hardware or staple embellishments as desired.  I cannot do that to plastic frames.  

The angel is a Christmas ornament I bought at the end of the season and tossed into my stash.  

As I mentioned, wood frames work the best for altering.  I'm always on the lookout for wood pieces in the clearance sections.  I attached the angel with a small eye hook that is easily screwed into the wood frame.  I didn't even need a tool because the wood is soft enough to screw with my fingers.   


Moving along, I decided to dab cream acrylic paint to the wood using a natural sea sponge.  The sea sponge is my choice because it leaves a stippled look on the wood - not full coverage. 


Here is a close up of the shadow box showing the details in the darling angel and the  star shaker.

The paper used is Graphic 45's Princess Collection - unfortunately a retired collection.

Thank you for stopping here today.  Happy crafting.


Shop Here: 


Friday, October 2, 2020

Spooky Patchwork Pumpkin Home Decor with Shaker Embellishments

This is the time of year to shop for those Halloween bargains that don't break the budget and are interesting to alter with your personal flair.  It's Halloween decorating season!

Today I'd like to share a DIY Halloween home décor piece that is easier than it looks.

Here are the chipboard pieces used on the pumpkin; Creative Embellishments - Jolly Jack O Lanterns and Creative Embellishments - Spider Shaker.

Creative Embellishments - Spider Shaker?search=spiderCreative Embellishments - Jolly Jack O Lanterns.html

DIY Instructions/Tips
I created a quick tutorial showing how I made this pumpkin.  Enjoy! I started out with a fairly unattractive foam pumpkin ( it was super cheap - maybe because it was what I call "underwhelming") and Halloween fabric I purchased because it was fun.  I don't sew or quilt but I still have to stop and admire the fabrics. Once in a while I indulge in a 1/4 yard here and there.

My pumpkin is approx. 9 inches around so I cut the fabric into 3in strips to cover the pumpkin ribs.  The size of the fabric strips will differ depending on the size of the pumpkin.

I slathered Matte Gel Medium onto the pumpkin and smoothed the fabric over the pumpkin.  Then I covered the fabric with the matte gel medium.  The gel medium dries clear and acts like a great glue.  I also used matte gel medium because I do not want a shiny finish.

Gel medium is like Mod Podge.  That works well too.

Prima - Finnabair - Art Basics - 3D Matte Gel - 8 Ounces

After the pumpkin is completely covered in patchwork, I took hemp and twisted around the pumpkin stem to finish the piece and hide the fabric seams that join at the stem.   I started the hemp at the top of the stem and worked toward the pumpkin.

Time to decorate the pumpkin.  I added black cheesecloth ( now is the time to skip to your dollar store and grab the Halloween spooky cheesecloth).  I also added black lace.

Next, I added the Creative Embellishments - Spider Shaker   to the side of the pumpkin.  I painted the spider with black and gray acrylic paint, and filled it with fun, fabulous Buttons Galore - Trick Or treat Shaker Mix .

Buttons Galore -Trick Or Treat Ll624?_pos=2&_sid=28eba0ac1&_ss=r


Finally, I finished off with a black polkadot tulle bow and one of the chipboard pumpkins from Creative Embellishments - Pumpkin Faces.

Thanks for stopping here today.  Happy Spooky Crafting.