Showing posts with label spooky. Show all posts

Wednesday, October 16, 2019

Rattling The Bones - Tombstone Shaker - Tim Holtz Products with Buttons Galore


Rattling The Bones 
Creepy Halloween Tombstone Shaker

Halloween draws near and I am finishing up the creepy but fun decorations.  This piece was created at recent scrap getaway where we all worked on tombstones.  
It's amazing that we all had the same materials to use, however each one was soooooo different.  
That's what I love about the creative process.  It allows for the freedom to express your imagination and vision.  

I turned my tombstone into a bone rattling shaker.  Literally.   
The Products Used
The skeleton is from the Dollar Tree - yep the dollar store.  I got a 3 pack, you guessed it... for $1.  

Next, the tombstone and embellishments are from Tim Holtz  because he is a King of Creepy Embellishments for Halloween. 

The Tim Holtz Etcetera TOMBSTONES are new.  VERY very cool- with several designs and sizes. They do need to be painted.  Mine was painted with gray acrylic paint, highlighted with white paint on a wet sponge (as a wash), then edged with Black Soot Distress Ink for the finishing shadow effect. 

*********************************************************************************
Tim Holtz Idea-ology BONEYARD Findings th93964
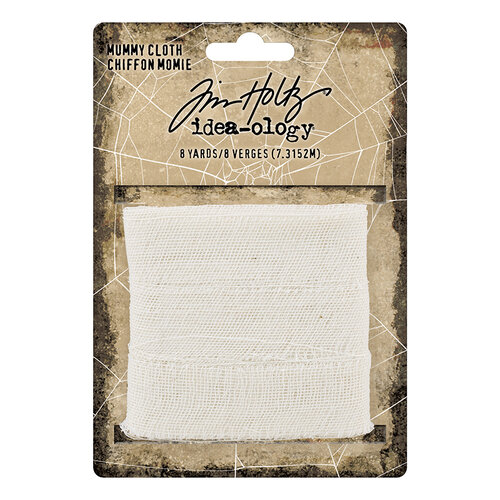
Idea-ology - Tim Holtz - Halloween - Mummy Cloth

*********************************************************************************
Tim Holtz Etcetera TOMBSTONE 8 ETC011


Tim Holtz Idea-ology CORKED VIALS 9 Glass Bottles TH92899


*********************************************************************************

Once I started building my vision, I realized I had no way to sit the skeleton against the stone.  He doesn't bend so he was being difficult and awkward. 

That's when I noticed the packaging from the Tim Holtz BONEYARD Bones .  It was actually the perfect size for a shaker shelf to rest his tired bones. That's when the shaker idea was born. 

The Shaker Material
The shaker mix is from Buttons Galore and More, with the Tim Holtz bones added.  

The shelf is filled with Buttons Galore - Embellishment Bottles -Back in Black and the glass jar has Berry Patch.

I also sprinkled some Berry Path beads here and there for accent and added purple beads to the skeleton's eyes.
*********************************************************************************
 back in black buttonsPatriotic Slider Pop-up Card
 berry patch bottle
Buttons Galore -Embellishment Bottles -Berry Patch -LL621


Buttons Galore

*********************************************************************************
In order to secure the skeleton, I did use black wire around his neck, which you can see in the image below.  The white cheesecloth is an afterthought to hide the wire around his legs. 

Finishing touch is a Wood Veneer Bat from Creative Embellishments Embellishments.  This has been wired into place as well.  


Thanks for stopping here today.  I appreciate your visit. 


Shop Here:
*********************************************************************************

Tim Holtz Idea-ology BONEYARD Findings th93964
Idea-ology - Tim Holtz - Halloween - Mummy Cloth
Buttons Galore

*********************************************************************************
Tim Holtz Etcetera TOMBSTONE 8 ETC011


Tim Holtz Idea-ology CORKED VIALS 9 Glass Bottles TH92899
 berry patch bottle
*********************************************************************************
 back in black buttonsPatriotic Slider Pop-up Card
Tim Holtz Idea-ology CRYPT CAMEOS Findings th93967

wood veneer bats


Tuesday, October 23, 2018

Spooky Fun DIY Halloween Cards Using Chipboard and Stamps


It's super easy to create your own Halloween cards.  DIY is the way to go these days.  I have some super economical products I paired to make holiday DIY cards.  

My product choices?  Creative Embellishments chipboard and JustRite Stamps.  Both of these product picks provide value.  Scroll down and see how much chipboard/veneer come in a package. That means you can make multiple cards for the money. 

Creative Embellishments has the cutest Halloween chipboard and veneer pieces. 
I made a few Halloween cards to send to my sons who "flew the coop" and moved away. 


Here's the list of the Creative Embellishment chipboard and veneer pieces I used:

I kept the treatments of the chipboard  and Candy Corn Veneers were very simple.  I painted them with following acrylics:


I also created my own background for this card using stamps from JustRite Papercrafts.  
This first card was created using the JustRite Swirly Dots Background Stamp.  


This second card was made by placing the Creative Embellishments - Witches . chipboard set (painted with Prima Art Alchemy Sparks - Acrylic Paint - Iris Potion ) over a stamped background.  


Where to shop? 
Shop for chipboard, wood and flair buttons from Creative Embellishments here.  
You can shop for JustRite stamps and dies right here

Treat Bags
Witches
Creative Embellishments - Witches
Creative Embellishments - Treat Bags
Creative Embellishments - Pumpkin Faces
Pumpkin Faces
Creative Embellishments - Candy Corn Veneers
JustRite Swirly Dots Background Stamp
Prima Finnabair Art Alchemy - Acrylic Paint - Fresh Orange
Prima Finnabair Art Alchemy - Acrylic Paint - Lime Peel
Prima Art Alchemy Sparks - Acrylic Paint - Iris Potion


Thursday, October 4, 2018

Spooky Halloween Home Decor Canvas


Hello friends.   Today I'm here with a Halloween Canvas to decorate for the spook-fest later this month (Halloween). 

This is a fun and whimsical piece of home decor that features a few of Creative Embellishments amazing designs:


I kept this canvas somewhat simple.  The canvas board is sized 6"x8".  I painted the board with Soft Matte Gel Medium and then applied a layer of cheese cloth to the canvas board.  

The gel medium dries clear, protects the canvas board from getting dirty, and acts as a great adhesive enabling me to apply a layer of white cheese cloth right to the canvas.

Next I painted the  Spider Web Circle Frame with black acrylic paint and then coated the spider web frame with Prima Finnabair Soft Matte Gel Medium  and adhering to the canvas.  


I dabbed some white acrylic paint onto the mummies and glued small strips of cheesecloth to the Mummies.


Once the canvas was assembled, I backed with patterned paper from Pebbles (Midnight Haunting collection) and taped the entire piece to a frame with the glass removed.  This way, the canvas can be dimensional and be a fun table top holiday piece. 


Here is a shot to show the dimension of the mummy and the Pumpkin Faces.  
I did add black fun foam to the back of the mummy for additional dimension.   


 Thanks for stopping here.  

Where to Shop? 
 You can shop for Creative Embellishments chipboard, flair buttons, veneer and stencils and stamps right here. 


Products Used:
Creative Embellishments -MummiesPrima Finnabair Art Alchemy - Acrylic Paint - Fresh Orange 
Prima Finnabair Art Alchemy - Acrylic Paint - Lime Peel
Prima Finnabair Soft Matte Gel Medium 961428
White Cheesecloth
Canvas Board 6"x8"
Sponge Brushes
Frame

Tuesday, October 2, 2018

Spooky Halloween - DIY Cards


Hello and welcome to October.  
The month where the spooky festivities begin.  Such a unique month - one of transition from warm to cool, lawn mowing to leaf raking, whimsical carefree summer to spooky autumn. 

So that can only mean one thing.........crack out those Creative Embellishments  Halloween chippies and dive right into DIY Halloween cards.   

My cards were created for the October challenge at Creative Embellishments which focuses on the image below.     I took my inspiration from the skull on the black image. 

Creative Embellishments chipboard helps make DIY cards simple and quick because the designs are clever and outstanding.  
I made two cards using chipboard from Creative Embellishments:


The Trick or Treaters are painted with black /white acrylic paint in silhouette style and placed on bold papers to make the silhouettes pop.  Noting too fancy here.   


My second card incorporates Steampunk Skulls accented with Mini Gears 3/4in .

While this looks fancy, it's still quite simple.
The Steampunk Skulls and Mini Gears 3/4in were painted with acrylic paints.  Once dried, I added some Stickles glitter glue to the gears.  

Next I coated with Skull with Ranger Crackle Accents  - Crackle Medium
and accented with gears and gems. 


Your inspiration for the Creative Embellishments monthly challenges can be interpreted as you please but it must have a piece of Creative Embellishments chipboard on it.  
Enter the Creative Embellishments Challenge here.  

Where to shop? 

Shop for chipboard, wood and flair buttons from Creative Embellishments here.  


These are the products used:

Tuesday, October 17, 2017

Enchanting Halloween Shaker Card Made With LOVE Plus Handy TIP

For the Love of Halloween! 

Here's an enchanting card I made with love. 
Clearly many folks love all things Halloween. 
It's wild popularity has some websites suggesting it to be the second biggest holiday next to Christmas. 

Count me as one of those folks who adores the decorations and festivities of this quirky, fun holiday. 
Spellbinders has given us Halloween fanatics some hauntingly wonderful products to celebrate the season.  


I created a shaker card to send to a family member enchanted by Halloween.  I thought the Spellbinders - Nothing But Love Stamp  by Tammy Tutterow would be a cute twist to use on the background of my card.  After all, it's all about the LOVE of all things Halloween. 

Scroll down the blog post and I'll share my handy recycle tip and money saving for shaker cards. 

These are the Spellbinders products I used:

Here is a better image to show the dimension of this card. 
And aren't those bats simply darling? 


Handy Shaker Card Tip
Don't have any acrylic to make a shaker card?  This is what I do....I eat the rest of the baked goods I bought for the family - this one happens to be the beloved cheese danish.  Just wash and dry and instantly I have acrylic that's proudly been recycled.  

Better yet, have a friend over and share the goodies.  Eat, laugh and make a day crafting together creating Spellbinders shaker cards.  

Look at the top of the container....all that lovely usable acrylic begging to become a shaker card.  

The possibilities are endless - baked goods, fresh fruit and veggies, packaging from your crafts and crafting flowers....search the house high and low, then eat up! 
.....but  PLEASE be mindful of products with allergens like peanuts if you are giving cards to others.   


Thanks for stopping by.  Have a bewitching Halloween season.  

Shapeabilities Witch on Broom Holiday 2017 Etched Dies  S4-834
Spellbinders - Nothing But Love Stamp Set Happy Grams #4  by Tammy Tutterow SBS-153
Spellbinders Nestabilities Classic Heart Die S4-136