Showing posts with label shaker. Show all posts

Wednesday, June 30, 2021

Camping Adventure Home Decor With Shaker - With Mini DIY Instructions


Traveling Across America - DIY Home Decor

Do you love traveling and creating your own camping adventures?  Perhaps it's something you dream of doing one day?  I have the perfect DIY home decor project for you to customize as you see it.  

This features Creative Embellishments  wood home decor piece, with chipboard shaker set and words.  Here are the products used:   United States - Wood Home DecorCamper Shaker Set and Creative Embellishments Travel Word Set 1.  


100% Customizable  
What I love about the wood USA home decor piece is the ability to customizable this for a gift, for yourself, for the camper even.

 *  Use this map to commemorate your travels by adding stars to the places you've traveled.

* Use this as a wishlist for all those adventures yet to be traveled.

* Paint the shaker to resemble your camper and add your name to the door.  How cute would that be!

Instructions to Make the Camper Shaker

Step 1.  Paint the background chipboard piece with white acrylic paint.  I used a sea sponge because I find it very easy to dab the paint onto the chipboard.

Step 2.  Block off part of the shaker base by taping paper over the base.  NOTE:  Do not place tape directly on the painted chipboard.  You may risk peeling the painted layer off when you remove the tape.
Step 3.  Block off the bottom of the shaker base by taping paper over the base.  Worth noting again:Do not place tape directly on the painted chipboard.  You may risk peeling the painted layer off when you remove the tape.
 I do like using the sponge to dab the paint because it's very easy to paint without risking getting paint under the paper.
Step 4.  Paint the remaining pieces of the shaker with acrylic paint as desired.  I used silver paint.  LET DRY completely before gluing together.
Fill the shaker with fun and fabulous shaker mix.  I used Firecracker Sprinkletz mix from Buttons Galore.  They have a great selection and really help add magic to my shakers.


This is the second in my America Home Decor series, "Freedom Isn't Free".  You can see the first home decor piece right here.
Thanks for stopping here.  Happy crafting and have a fabulous week.

Sunday, February 28, 2021

Dog Paws Home Decor - With Shaker


Hello friends.  Jennifer Snyder here with some dog-gone adorable DIY home decor.  

Creative Embellishments has an amazing assortment of wood DIY home decor designs to inspire you and get you in a decorating mood.   There are seasonal favs as well as whimsical and classic designs, from gnomes to angel wings.  

My choice today is the Paw   with paw pad pieces for layering.  


Quick Instructions: 

I created an acrylic paint wash using watered down acrylic paint then lightly applied the wash to the wood.  I did this because I did not want the engraved details to get covered by thick acrylic paint.  The sea sponge allows easy and quick application of the wash in my opinion. 


Inked edges add depth and richness.  I used Ground Espresso Distress Ink.  

I covered the paw pad pieces and inked the edges.  

Now time for decorating and adding special touches.  I used two accenting features: Dog Shaker Set and Friends Fur Ever chipboard set with sweet little paw prints. 

Both pieces were painted with acrylic paint, then accented with the Ground Espresso Distress Stain used above.  Once dry, I topped with Range "Crackle Accents", added some sequins and beads (from the shaker mix) to the wet Crackle Accents and set aside to dry. 


The shaker mix selected is from Buttons Galore and is called Mermaid Lagoon, a fun combination of beads, heart shaped sequins and an assortment of buttons.  

The shaker mix compliments the paper choice perfectly:  Authentique's Purebred 12x12 and 6x6 paper collections.  

Thanks for stopping here to visit.  

Sunday, February 14, 2021

Angel Shadow Box DIY Home Decor with Shaker - Instructions


Hello.  Happy Valentines Day!

Today I'm sharing my version of a very untraditional DIY Valentines home decor project.  Hmmm how so?  Well this was created for my little Granddaughter's room.  My first grandie is 7 months old and in this day of Covid, we have not gotten the opportunity to spend as much time with her as possible.  Sadly she moved 1000 miles away last week.

That is why this is a Valentines piece - made from my heart for my little loved one.   Of course the added spin to this is that I used  some of my favorite chipboard pieces AND added a shaker ( which I love making).

Scroll down and you can see the DIY tips and instructions for creating a home decor shadow box. 

Here are the chipboard pieces used in this shadowbox: Creative Embellishments Star Shaker set  and Girl Word Set.  The Star shaker set was simply painted with cream acrylic paint.  The chipboard words were embossed with Ivory Aged Embossing Enamel  from Stampendous.


Ivory Aged Embossing Enamel .60oz - Stampendous


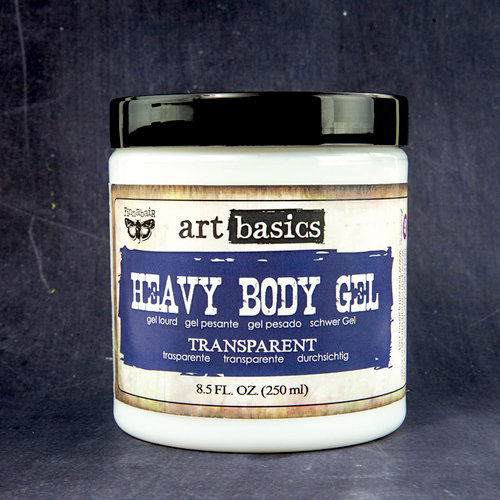
No shaker is complete without fabulous shaker mix.  I used Buttons Galore's new Shaker Mix in a Cube- Spring Blooms.  I added the mix to the shaker, obviously, but I also added it to the bottom of the shadow box using matte gel medium, such as Prima's Art Basics - Heavy Body Gel as an adhesive.

Buttons Galore -Spring Blooms Ll547Prima - Finnabair - Art Basics - Heavy Body Gel - 8.5 Ounces


Tips and Techniques

The wood frame used for the shadowbox was really a table top home decor piece on clearance at Michaels.  I am flipping it around and using the backside of the piece.  The wood frame is perfect because I can add hardware or staple embellishments as desired.  I cannot do that to plastic frames.  

The angel is a Christmas ornament I bought at the end of the season and tossed into my stash.  

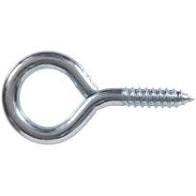
As I mentioned, wood frames work the best for altering.  I'm always on the lookout for wood pieces in the clearance sections.  I attached the angel with a small eye hook that is easily screwed into the wood frame.  I didn't even need a tool because the wood is soft enough to screw with my fingers.   


Moving along, I decided to dab cream acrylic paint to the wood using a natural sea sponge.  The sea sponge is my choice because it leaves a stippled look on the wood - not full coverage. 


Here is a close up of the shadow box showing the details in the darling angel and the  star shaker.

The paper used is Graphic 45's Princess Collection - unfortunately a retired collection.

Thank you for stopping here today.  Happy crafting.


Shop Here: