A fairytale wedding card for a fairytale wedding? It sure is! Creative Embellishments chipboard helped this fairytale card come true.
I'm here with an oversized but absolutely charming idea for a card that makes a giant romantic statement. Scroll down and I will show you my DIY tips for turning Creative Embellishments Triptych into a statement piece.
A card made from the magical pairing of Creative Embellishments products and gorgeous Stamperia papers ( Wonderland collection).
These are the chipboard pieces I used to create this magical card or tabletop decor piece.
Here is a close up of the graceful Creative Embellishments Bride Groom Couple. They were simply painted with an acrylic white wash ( white paint thinned with water). After the paint wash dried, I sprinkled some Stampendous - Frantage Aged Ivory Embossing Enamels onto the couple and heat set them.
I did not cover the couple completely with embossing powder.
I did not cover the couple completely with embossing powder.
This is a view of the front of the card.
When the card is closed, it is a bit thick because of the chipboard layers inside the card.
I have made some allowances in the thickness when I was building the card.
The Triptych has lovely intricate edges. It is a large piece, standing 8 inches tall and 12 inches wide when assembled and opened.
Scroll down and I'll show you how I assembled the side flaps.
Here's How to Assemble the Triptych - DIY
As mentioned above, the Creative Embellishments - Tryptych is thick when chipboard is layered inside and the card is closed. Allowances need to be made if using this as a card or decor that will be closed.
You certainly do not want your beautiful work crushed.
I cut a flap that was then scored and folded. See in the photos below, I added these flaps BEFORE my background paper was added. These are going to act like hinges. I have allowed for 1/4inch thickness.
Once the flaps or hinges are added, you can finish covering with paper. This set just hides the flaps and cleans up the card.
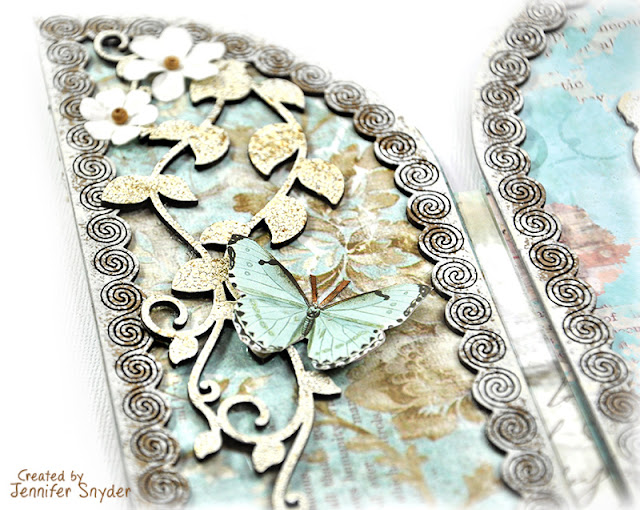
I chose to place the decorative edges on the inside of the card so that when it was opened, it looked finished and cohesive.
My treatments on the edges was quite simple. I used a sea sponge to dab an acrylic white wash (acrylic paint mixed with water) onto the chipboard. The sponge is great to use when you do not want total coverage.
I used the Vine Corner to decorate the inside of the card. I simply embossed the piece and cut into pieces to create a garden look throughout the entire piece.
Here are a few more images to share.
The front of the card is adorned with the following chipboard:
The graceful Archway Style 1 is like the gate that greets the bride and groom as they walk into the garden for their ceremony. I thought it was a perfect fit for the shape of the triptych.
The Flourish Set 10 chipboard vines were embossed using Clear Embossing Ink and Fine Gold Embossing Powder. The gold made them pop a bit.
The butterflies were cut from the Stamperia Paper - Wonderland collection.

The butterflies were cut from the Stamperia Paper - Wonderland collection.

Thanks for visiting today.
You can shop for all your Creative Embellishments products and chipboard right here.
You can shop for the Stamperia paper right here.
Products Used:
Creative Embellishments - Tryptych
Creative Embellishments -Archway Style 1
Creative Embellishments -Flourish Set 10
Creative Embellishments -Vine Corner
Stamperia Paper - Wonderland collection
Clear Embossing Ink
Fine Gold Embossing Powder
Stampendous - Frantage Aged Ivory Embossing Enamels


What an astonishing card! Lucky couple that gets this beauty!
ReplyDeleteAbsolutely gorgeous! Thanks for sharing how you made this beautiful work of art!
ReplyDeleteI should say only that its awesome! The blog is informational and always produce amazing things. annabel law productions singapore
ReplyDelete