Showing posts with label Hannah Elise. Show all posts

Thursday, March 15, 2018

Some of My Favorite Cards - Spellbinders


Hurry!  25% off on selected designer dies at Spellbinders.  

Seriously a great deal.

Here are some of my favorite projects using the designer collections.  

Let me break it down for you to help you shop...
because there is so much on sale.

There's the gorgeous


This card is seen here - with tutorials as well.  

_______________________________________________________

And how about: 
This ornament can be seen here (with tutorial.)

This a new card I just made.  You can find it here


____________________________________________
You can find the pumpkin card here with tutorial.  
You can see the blue card here with tutorial. 

__________________________________________________
The Venise Lace Collection:

This die is so much fun to use.  You can find these cards here

________________________________________________________

Christmas Dies and Stamps
I made a sweet pop up card from the Ornament die and stamp set.  You can see the full post here with instructions. 


_________________________________________________________
This gorgeous die is 

You can see this card here
____________________________________________________


Happy Shopping!


Sunday, December 24, 2017

Christmas Ornaments with DIY Instructions - Part 2

DIY Ornaments with Spellbinders Dies (Part 2)

It's the season of Christmas card making, but I had time to squeeze a few ornaments and provide a quick and easy DIY tutorial.  This is part two of my ornament feature. You can find part one here. 
Scroll on down the page for the tutorial.

Ornaments make a great gift when you need something small.  Why not have those small gifts of appreciation be dazzlers, right?  

This year my ornaments were made using a cool die from Spellbinders.  This is the second ornament I have made using this particular die.  The first ornament  is pictured below and can be found on my blog post here along with step by step DIY instructions.  


This ornament would not have come together so perfectly without my other essential products:  snowflake chipboard by Creative Embellishments and papers from Maja Design

In particular, my snowflakes are from Creative Embellishments  - Large Snowflake Set and my papers are from Maja Design - Joyous Winterdays collection.  


  Here is the die I've been raving over.  


Quick and Easy DIY Tutorial


Fold each diecut in half lengthwise.   A Bone folder and scoring board will  give you a nice crisp fold.


Step 2Assemble the ornament by gluing the sections together as in the photo above.  Once all four pieces are assembled, your ornament should look like the photo below.  


Step 3.  Pick an embellishment that can dangle nicely inside the ornament.  I am using chipboard snowflakes from  Creative Embellishments  - Large Snowflake Set.  

I used fishing line (nylon filament) to string the ornament because it's clear and helps place the focus on the ornament/embellishments rather than on a bulky ribbon.  

Now you're set to decorate. 


Here is a closer look at the delicate ornament using 
Here's a look at the embellishing.  The snowflake chipboard really makes a "wow" statement with this piece.  


And one last look at the finished piece. 


Quick Links to Shop


May your Christmas and holiday season be filled with joy.

Products:


Tuesday, November 28, 2017

DIY Instructions - Christmas Ornament


DIY Ornaments with Spellbinders Dies 
(This is part one of two.  You can find part two here.  )

It's the season of Christmas card making and Christmas ornaments too!  I had time to make a few ornaments and provide a quick and easy DIY tutorial
Scroll on down the page for the tutorial.  

I enjoy adding to my Christmas ornament collection every year with something handmade.  It's so fun and satisfying to pull the collection out  and review the years at a glance.  

Part two of my featured ornaments can be found here.  

Ornaments make great keepsakes and little gifts of appreciation plus the added bonus of handmade ornaments is your ability to customize each ornament for your intended recipient.  

This year my ornaments were made using a cool die from Spellbinders.  
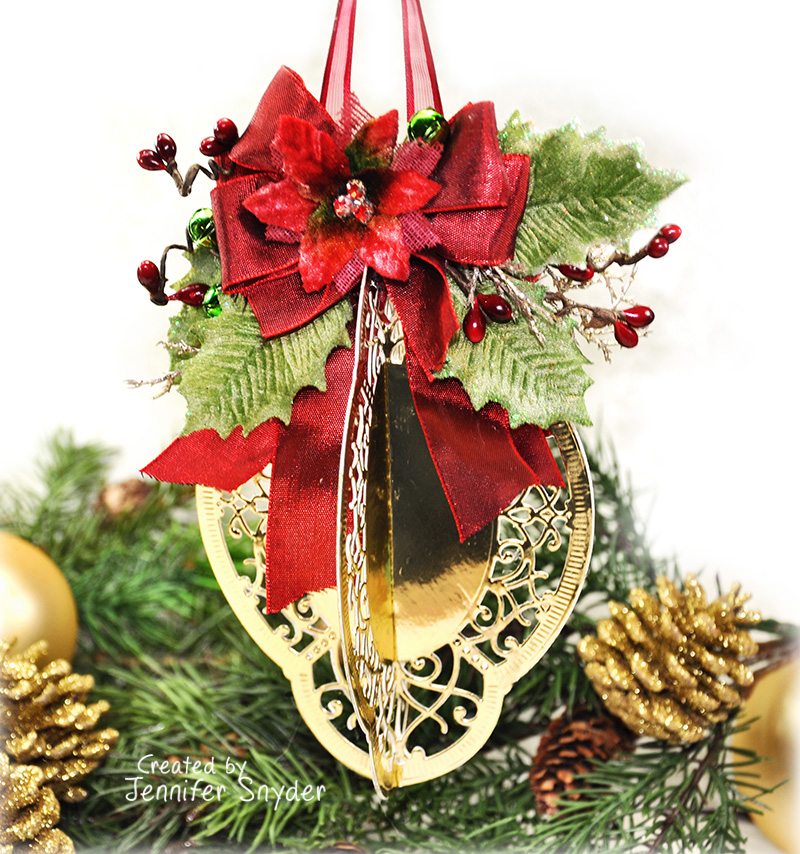
When I first looked at the Spellbinders Hannah Elise Layering Frame  Chantilly Paper Lace Collection by Becca Feeken , it reminded me of a graceful tree ornament.  
What do you think?   Am I right, or am I right?  


Quick and Easy DIY Tutorial


Fold each diecut in half lengthwise.   A Bone folder and scoring board will  give you a nice crisp fold.


Tip:  Heavy weight paper works the best in my opinion because it holds the structure of the ornament. 
I used gold metallic mirror cardstock (there are so many gorgeous rich metallic Mirror Cards to choose).   


Step 2.  Glue the pieces together - two at a time.  


Step 3.  Once all four pieces are assembled, your ornament should look like the photo below.    


Step 4.  Add a ribbon for hanging.  Now you're set to decorate. 
Here are some close ups of the details.   The leaves are from Prima Marketing (Prima -Victorian Christmas Leaves ) and are velvet holly leaves misted green using Prima Color Bloom Spray Mist - Lime Wedge .   

TIP:  You can use  a paintbrush dipped in stains or mists or even thinned out paint to customize your  embellishments and get the exact color you desire.   Bundled Sage Distress Spray  or Crushed Olive would be great as well - something like that to get the leaves green in lieu of actual green leaves.   

The flower is from Petaloo and the red floral berries are from a craft store - nothing special but what a great inexpensive filler (this is the time to grab a bunch on discount for the season .


 I value your time and wish you a wonderful holiday season and Christmas.