

I'm here to celebrate Valentine's Day the Flying Unicorn way...with three DIY cards featuring hearts. As we all know, hearts may be the symbol of Valentine's Day but hearts are always perfect to use year round.


Washi Tape Heart Card
This card is bright cheery and happy...and flat for those who really want to stick with flat, easy to mail cards. This is a washi tape card. The Flying Unicorn store has a variety of washi tape including gorgeous ginghams, chevrons, delicate flowers and trendy stripes.
Supplies:
Julie Nutting Stamp Set : Lots of Love 910488
Heart Punch or Die ( I used Spellbinders D-Lites Vines of Passion)
PreFolded card - 5.5x3.75
Washi Tape - Flying Unicorns LimeC Checkers washi tape
Washi Tape - Flying Unicorns Pink Meadow
Washi Tape - Flying Unicorns Hot Pink Checkers
Instructions:
This design is meant to be used on a card sized 5.5in x3.75in
Step 1. Cut a boarder from pink cardstock approx 1/4in smaller than the card. Glue to card as a mat.
Step 2. Cut a smaller white rectangle and punch or cut a heart shape slightly off center. Leave enough room for a sentiment.

Step 3. Place the rectangle from step 2 down onto the card and trace the heart shape with pencil. When you remove the white rectangle, you will see the pencil outline from the heart. This will show you exactly where to place your washi tape strips. I covered the heart with strips of washi tape: LimeC checkers, Pink Meadow, and Hot Pink Checkers.


Step 4. Glue the top piece in place.

Step 5. Stamp your sentiment. The sentiment is from Julie Nutting Stamp Set : Lots of Love. These sets are great to use on everyday cards. the punched heart rectangle onto the card. See how pretty this looks?
Here is a great card set that can be used as a sentiment for the card. Here is another one, "Sending you warm wishes", how perfect.

Step 6. As one final step, I used a very fine tip marker and added some faux stitching around the heart and then topped the card with a sweet little ribbon.


Lemoncraft Christmas Wishes collection
Tim Holtz Walnut Stain Distress Ink
PreFolded card - 5.5x3.75
Lace Trim ( from my stash) but these are great choices and this
String , this wax cord and this cord is great
Gingham Ribbon from my stash
Pearl bead
Instructions:
This design is meant to be used on a card sized 5.5in x3.75in
Step 1. Cut layers, heart and strips of patterned paper. Ink all the edges.

Step 2. Assemble

Step 3. Add lace and ribbon.

Step 4. Top with the heart, cord and a pearl.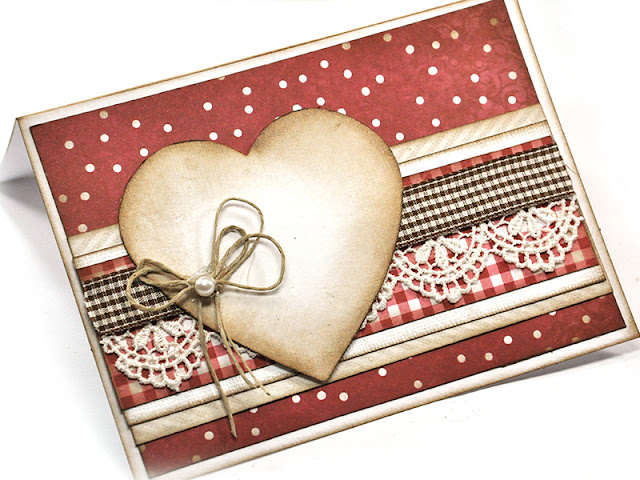


This is the third card. This features the Maja Design "Summer Crush" collection.
Hearts Card Featuring Maja Design Summer Crush
Supplies:
Maja Design Summer Crush collection is here
Maja Design Summer Crush - "He Gives Her Flowers" paper SUM-757
Maja Design Summer Crush - "Snapshots" paper SUM-767
Kraft cardstock
Kraft prefolded card
Cut or punched hearts
Pearl bead
Hemp
Tim Holtz Walnut Stain Distress Ink
Step 1. Cut layers and Ink edges including the kraft pre-folded card. 5.5in x 3.75in

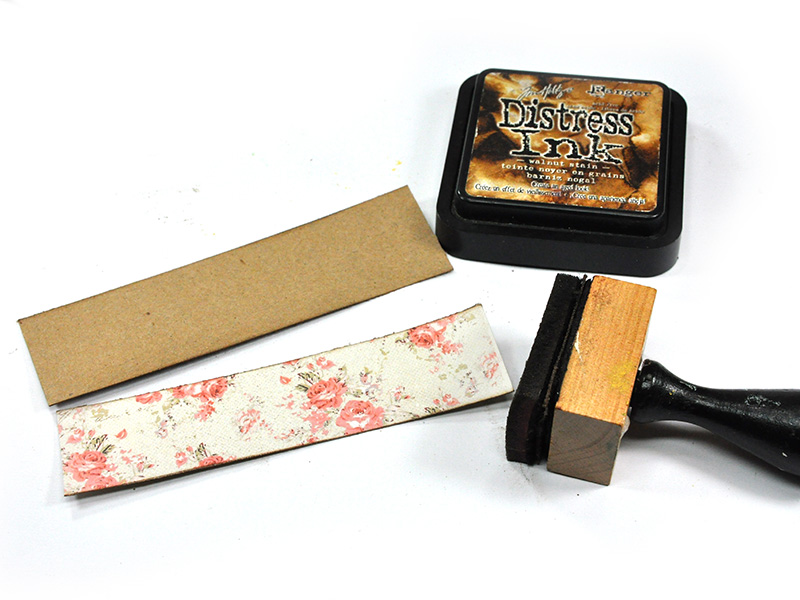

Step 3. Cut your hearts out and ink the edges with Walnut Stain. You'll have two large hearts and 1 small heart.

Step 4. Glue the large hearts to the card. Add foam tape, pop dots or cardboard to the small heart for dimension. Glue to card.

Step 7. Tuck in a little trim ( I used brown gingham) and a hemp string bow. Add a few embellishing pearls.

Thanks for stopping here today.
Visit our NEW Store!
Are you visiting the Tallahassee area soon?
Stop in and say hello!
Plan a day trip! Crops -Classes-Fun
Are you visiting the Tallahassee area soon?
Stop in and say hello!
Plan a day trip! Crops -Classes-Fun
These are gorgeous!!! what beautiful color schemes! Love it!!! Thanks!!
ReplyDeleteLovely cards. Thanks for sharing.
ReplyDelete