Showing posts with label FabScraps Shabbylicious Collection. Show all posts

Wednesday, September 4, 2013

FabScraps Shabbylicious Collection - Birds in the Window


 Bird in the Window
The layout was made using the most fabulous collection from FabScraps - Shabbylicious.  This is a shabby chic gals dream collection. Light pinks and blues and a touch of whitewash. Amazing chipboard pieces and die-cuts that are absolutely innovative. They mix and match with the chipboard pieces.

I love the chipboard window.  It's perfect for a little garden window.
I also added a little hint of yellow to my gesso background for a dash of sunlight.


 The bird image is from the Graphic fairy.   I cut them from the photo paper and backed with cardboard to give the birds dimension.  I like backing large  images with cardboard since it supports the image a little better than dimensional pop dots.

I added some pearl jewelry pieces I had in my stash to gussy up the window.  I also added a bunch of wonderful Prima flowers.


You can find the whole collection here.
You can purchase the collection at Flying Unicorns.

Supplies:
FabScraps Shabbylicious Collection - Shabby Mix C60004
FabScraps Shabbylicious Collection - Little Darlings C60003
FabScraps Shabbylicious Collection - Window & Two Shutters DC60009
Prima Stencil 960438
Prima Flowers Frost Frappe VII  565787
Prima Clear Stamp 960803
Pearl jewelry
lace
Seam Binding
card stock
Martha Stewart Doily Lace Edge Punch

Tuesday, September 3, 2013

FabScraps Shabbylicious Collection - Timeout Chair


Timeout Chair
This photo was taken in North Carolina Sept 2012.  A group of fellow scrappers were visiting Maggi Harding.  Her wonderful husband kindly offered to driving us around the rural parts of North Carolina to find interesting sights to photograph.    This chair was inside an equally dilapidated house. As we peered through a window frame, we saw it and dubbed it the "timeout" chair.

The layout was made using the most fabulous collection from FabScraps - Shabbylicious.  This is a shabby chic gals dream collection. Light pinks and blues and a touch of whitewash. Amazing chipboard pieces and die-cuts that are absolutely innovative. They mix and match with the chipboard pieces.


In the photo above, I used the FabScraps chipboard piece called "Formal Chairs" and covered it with a die-cut to match.  What a cool  and clever idea.


You can find the whole collection here.
You can purchase the collection at Flying Unicorns.

For This Project You Will Need
Instructions
1.     Background  Paper Preparation:
2.     Start with FabScraps  Shabbylicious Collection –Chic Chairs paper  C60 006 for your  background.
3.     Cut strips of Shabbylicious Collection –Chic Mix C60 008 and layer the strips horizontally on the right side of the page starting an inch from the top.  Continue the layers down the page to about an inch from the chair graphics.
4.     Add a few small paper strips to the left edge of the paper halfway down the page.
5.     Add decorative tape over the paper strips on the left edge of the page as a new layer.
6.     Add some texture to the page using the stencil and molding paste or heavy gesso around the page.
7.     Photo Preparation:
8.     Rip a piece of cardboard just a little bigger than your photo and paint the cardboard white with gesso or acrylic paint.  Let dry.
9.     Adhere the photo to the dried cardboard.  
10.   Glue the card board to the page on a slight diagonal on top of the layered strips of Shabbylicious Chic Mix paper.  
11.   Glue the “Shabby” journal piece from the Shabbylicious Collection - Journal Packet MC60001A  to the bottom left of the photo..
12.   Chipboard Preparation:
13.   FabScraps Shabbylicious – Formal Chairs chipboard DC60 011 has an accompanying die cut found in the Shabbylicious journal packet.  Cut the chair out and glue to the chipboard piece.
14.   Lightly paint the edges of the chipboard chair with gesso.
15.  Adding Embellishments:
16.   Glue lace trim under the “Shabby” journal card.
17.   Stamp some flourishes to the bottom right of the photo.
18.   Stamp some flourishes to the left edge of the paper halfway down the page (near the paper layers).
19.   Glue some small pieces of burlap around the page –under the cardboard photo mat – a little piece to the left of the photo – to the left edge of the page as a new layer over the paper strips and decorative tape.
20.   Glue chair chipboard in place to the right of the photo and on top of the burlap.
21.   Embellish with flowers and floral berries as desired.
22.   Enjoy. 


Tuesday, August 13, 2013

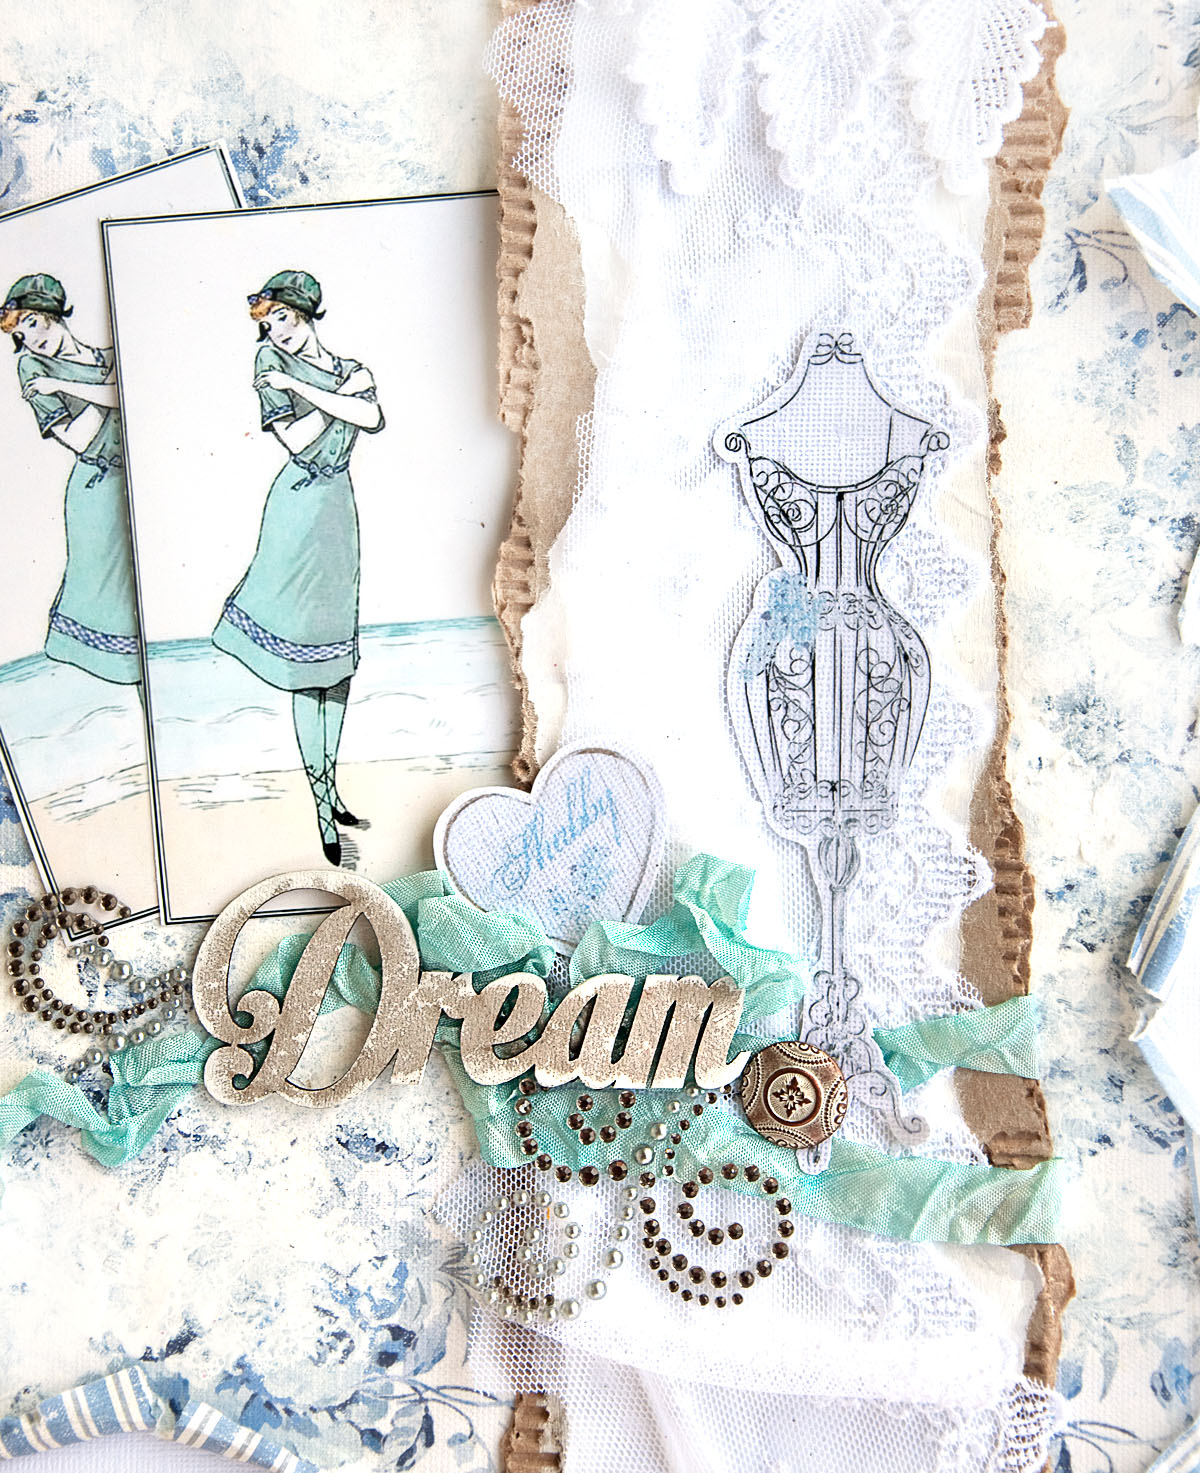
FabScraps Shabbylicious Collection - Dream


Dream
FabScraps has a wonderful fresh collection out.  It's called Shabbylicious and it's just that.  Shabby, delicious and amazing. 

I created this using a few different items from the collection ( the stickers and the chippies in this set are beyond gorgeous):
  • Shabbylicious Collection -Shabby Blues Paper  
  • Shabbylicious Collection - Dream Chipboard 
  • Shabbylicious Collection  - Shabbylicious Stickers 
  • Shabbylicious Collection  - Shabbylicious Heart Stickers
In the photo below, you can see that my chipboard "Dream" is almost neked. The FabScraps chipboard is very cool in that it is a light sandy colored chipboard and looks wonderful neked or with a little white wash on the edges. 

Some brands of chipboard have a grey tone to them - which typically means you have to treat them with gesso or paint first if you want them to be light and airy feeling. That's why I love FabScraps chippies.  They already start out light and require little treatment if desired. 


So let's talk a moment about the stickers in this collection.  They are wispy feeling to me - delicate, dainty, with a little romance thrown in.  The stickers are really unique.  They are printed on a transparent background. When you use them, they are light like a delicate watermark on your page.  If I want them to stand out a little more, then I mount them on card stock and cut around them.  

The wonderful part about  mounting them to card stock is that you can alter the colors of the stickers with your choice of card stock, making them totally customized for your specific project.  You cannot do that with many stickers.

The dress form sticker - ohhhhhhh man,  I need a few more of those. 


The seam binding ribbon was inked and not misted. I used Tim Holtz - Tumbled Glass distress ink to color this.  I rubbed the ink pad along the seam binding then sprayed with a little water to "activate" the ink - as Timmy would say. 


Here is a sheet of the Shabbylicious paper:

My image is from an old postcard from early 1900's that I photo edited with a fresh updated look. 
Below are some instructions on how I created this.  
Thanks for stopping by and have a great day. Shabbylicious Collection
For This Project You Will Need
Instructions
1.     Background  Paper Preparation:
2.     Start with FabScraps  Shabbylicious Collection –Shabby Blues paper  C60 002  –  dab gesso around page to lighten some of the patterned print.  You can use your fingers to spread the gesso, use a sea sponge, brush or foam brush.  They all work nicely.
3.     Mist the edges of the paper  lightly with water (you can also use wet wipes or a wet sponge for this).   Using your finger tips, roll and scrunch the paper edges here and there to give the edges definition.   Use a heat gun to dry.  The heat gun actually makes the wet paper stiffer and keeps it in place.
4.     Mount the Shabby Blues paper  C60 002  to a 12x12 piece of white cardstock.  
5.     Rip a strip of white cardboard from a box approx 3in x 12in , and leave some edges jagged.
6.     Glue lace strip to the top of the cardboard.
7.     Cut  a piece of seam binding or ribbon approx 18 inches and wrap around the cardboard starting about 2 inches from the bottom of the cardboard strip. Let the loose ends of the ribbon hang free for now.
8.     Glue vertically to page placing right of center  and arrange the ribbon/seam binding ends so they flow horizontally off the cardboard to the left. Glue ribbon in place.
9.     Glue the photo images to page –  placing at the center of page
10.   Embellishment Preparation:
11.   Using the  Shabbylicious Stickers ST60 001 Dress Form and the Shabbylicious Heart Stickers ST60 002, remove  your chosen stickers from sticker sheet and place on white cardstock to back the sticker with cardstock,   Fussy cut around the stickers.  The stickers are very transparent and backing them with white cardstock gives them better clarity and definition.
12.   Glue the Dress Form sticker to the cardboard strip. 
13.   Glue the Heart sticker to the cardboard.
14.   Chipboard Preparation:
15.   FabScraps Shabbylicious –Dream chipboard DC60 005 – dab the edges of the chipboard with gesso and leave the majority of the chipboard untouched.
16.   Glue to page over the seam binding /ribbon.   
17.  Finishing Touches:
18.   Glue lace trim piece to the top left corner of the layout.
19.   Place some crystal flourishes around the page as desired.
20.   Enjoy.