Saturday, December 5, 2015

Frank Garcia Design Team Blog Hop


Welcome. Thanks for joining our blog hop all day,  Dec 5th.  The blog hop starts at Frank Garcia's blog.  You should have arrived here from Trina McClune's blog. We are here sharing our paper crafting passion and love for Frank's designs. 

Here are his 2014 and 2015 designs in addition to the Victorian Christmas collection that I am showcasing today.   2016 only promises to be even more spectacular!  

The Blog Hop Details
A few details...Frank has a giveaway for those who leave comments on our blogs. 
I am also giving away a prize pack chock full of Vintage Christmas goodies in time for Christmas gifts, tags and holiday cards.  So please leave a comment and tell me 
what you are excited to see in the new year.

Prizes Prizes Prizes
We have some magnificent prizes. To win them, you must comment and follow the blogs.
First is the Grand Prize  from Frank .

You will be eligible to win this prize collection by leaving a comment in my blog:

  
Before you scoot off to the next blog destination, I'd love to share a gift set I made using Frank's Vintage Christmas.  I have a step-by-step as well.  Please scroll through my tutorial because I usually have special tips and tricks to share. 

The next blog hop destination is at the end of my tutorial!

So How Did I make This?  

Step 1.  I used my box as a template for the patterned paper and traced around it. 


Step 2.  When I am working on projects like boxes and canvases, I like to adhere my patterned paper using Prima's Soft Matte Gel.  I slather on a nice layer of gel with my foam brush, lay down the paper and then use a brayer to make sure the paper has no ripples and bubbles. 
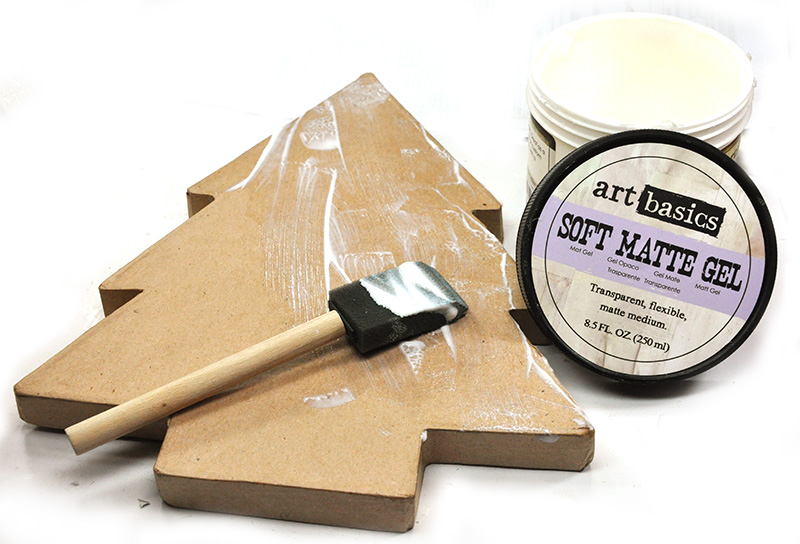

Step 3.  Once I'm satisfied my project is bubble free, I apply a thin coating of gel over the paper to seal it.


Step 4.  This step may be the MOST OVERLOOKED step when decorating any box in my opinion - major emphasis on those words "most overlooked ". 

Place the top on the box (whatever box you are using - including metal tins).  See where the lid stops.  It's important to note where the top ends - or how far down the top goes on the sides.  If you glue paper all the way up the sides of the box and cover the sides totally in paper, the box top MAY NOT FIT, or may rip the paper each time the lid is removed and set back on.  No good!  You need to think ahead.  Take note and work around that potential glitch. 

I pop the top on.  Make sure it's secure and then trace all the way around the box marking where the lid stops.  This is where my paper is going to end.  I need to leave the rest of the side bare neked so the top fits properly.  

Step 5.  Go ahead and now add your paper.  I also used Prima's Soft Matte Gel to adhere the paper, and topped the paper with a thin coat  to seal it.  
 NOTE where my paper sides end!

Step 6.  Add some of Frank's Memory Hardware Rocquencourt Doily trim.  


Time to Create a Cluster

Step 7. When I decorate a box,  I like to give the cluster some height ,dimension and angularity.  The box most likely will go on a table or shelf so I want the floral cluster to be seen when the box is lying flat. No sense decorating a box with flat decorations in my opinion .  It's meant to be shown , right? 

To create this dimension, I will use the wire stems from Frank's gorgeous flowers (Victorian Christmas collection-Red Stocking). The wire stems are going to be used as supports for placing flowers at an angle and creating an angular and dimensional cluster.  


This image shows how I use the wire stems as supports by bending then and gluing them onto the project with strong glue.  


This image shows my flower placement.  I glued it to the box at a slight angle using the wire stems as supports. 


This is the backside of the cluster. You can see the wired peeking through .  No worries - I'll cover them and hide them with some cool embellishment . 

Step 8. Time to add the illusion of a bow.   To do this, I grabbed Frank's Monpazier Gilded Trim from his Memory Hardware collection.  This trim adds sparkle and glitz to any project and is especially joyful for a Christmas decorative piece. 

You don't need to cut a giant piece and tie a bow, you just need the illusion of a bow.  Tuck a few loops into the cluster and BAM, it feels like a bow !  Save the rest of the gorgeous trim for another project.  


Step 9. I want to add more sparkle and glitz so I will pull out the Soft Matte Gel once more and dab on generous amounts of gel.  

Sprinkle some sparkle with Prima's Glass Glitter.  I promise the gel medium dries clear and your project will dazzle. 

Here is a close up of the glass glitter areas. 
Finishing Touches

Step 10. Time for some finishing touches. Those little finishing touches are what  makes your project special and adds wow factor.  Frank's collections have gorgeous and fascinating coordinated embellishments.  The Vintage Christmas Collection is no exception. I grabbed the cool wood embellishment, "Noel" as a sentiment.  

I selected a few more flowers from the collection for the top and tucked in some pine punches.   Lastly,I placed a few Memory Hardware Pearls about the box.   

I did add some trim from my stash around all the edges of the lid and I ran a bit of RubNBuff around the edges of the box for gilding. 

I also made a matching card to go with the gift set. 

Here are a few more close ups: 


***************************************************************************
So Back to the Blog....How to win a prize?  
I hope you enjoyed my step-by-step tutorial for my box set.  The Vintage Christmas Collection is totally divine and I'd like for you to have a mini kit to enjoy.  To be eligible, please leave a comment on my blog.  


Your next stop in the hop is Delaina's blog.  
Enjoy, good luck and Merry Christmas!

*****************************************************************************
Here is the complete Blog Hop line up: 

START: Frank 


Jennifer ( you are here) 


Cari 


Product List:
Prima Products Box:
990480  Prima Victorian Christmas by Frank Garcia paper - Pere Noel ( Top of tree box)
990503  Prima Victorian Christmas by Frank Garcia  - Le Sapin de Noel (sides of box)
583453  Prima Victorian Christmas by Frank Garcia -flowers Joyeux Noel
582517 Prima Victorian Christmas by Frank Garcia  -Wood Embellishments
583477 Prima Victorian Christmas by Frank Garcia - Red Stocking Flowers
991043 Prima Memory Hardware -by Frank Garcia - Rocquencourt Doily Lace
961428 Prima Art Basics Finnabair - Soft Matte Gel Medium
991036 Memory Hardware - by Franks Garcia- Monpazier Gilded Trim
961428 Prima Finnabair Art Basics -Soft Matte Gel.
961657 Prima Finnabair Art Ingredients Glass Glitter - Gold Lush
990381 Prima Memory Hardware - by Franks Garcia-Pearls

Prima Products Card:
990510  Prima Victorian Christmas by Frank Garcia paper - Un calendrier deLAvent
990503  Prima Victorian Christmas by Frank Garcia  - Le Sapin de Noel
583439  Prima Victorian Christmas by Frank Garcia - flowers Christmas Eve
583415  Prima Victorian Christmas by Frank Garcia -Flowers Holiday lights
583477 Prima Victorian Christmas by Frank Garcia - Red Stocking Flowers

Other Products:
branch punch
Trim/Ribbon


Friday, December 4, 2015

Kitty Cat Layout Featuring 2Crafty and Flying Unicorn


Hello everyone.  I'm here today to showcase my December pieces for Flying Unicorn's Dec kit - Your Passion Your Art.  The kit featured Riddersholm papers and I added some wonderful 2Crafty chipboard pieces as accents. This piece is a Christmas gift ( shhhhhh tell no one!  The kitty layout is a surprise for my sister who adores her beautiful Maine Coon kitty.)

I took the photo of my sister's kitty in May on a visit to her house.  I picked the chipboard word "Cherish" for a few reasons.  The first reason is that my sister lives 8 hours away and I do not get to see her often - nor do I get to visit her wonderful home.  My special treat was to drive my parents to her house for a visit in May.  oh my, I won't discus the road trip part of the adventure....YIKES, but I will say the visit was so heartwarming and a time to cherish always. 

Second reason, my sister does indeed cherish her kitty like a beloved family member.  Who doesn't , right?  We love our furry family.  The 2Crafty title is perfect, or maybe I should say it's "purrrrrfect".  


" Fluer Arrows"                    "Cherish Loopy Font"                   "Formal Flourish 1"

I really needed the chipboard to pop on this piece amidst the confusion. I painted all my chipboard pieces simple white.  I used the "Formal Flourish 1" chipboard design as a border for my kitty to rest upon. 

I made this layout using the December kit from Flying Unicorns.  It features Riddersholm papers this month and I found the colors to be a great match for my photo of Kitty. 

Here I added a gem to the " Fluer Arrows".  


You can find a great selection of 2Crafty chipboard pieces at Flying Unicorns, right here.

Products - Cat Layout :
Flyin Unicorns - Dec Kit Your Passion Your Art
2Crafty Chipboard "Cherish Loopy Font" wordcherishl
2Crafty Chipboard"" Fluer Arrows" , "Formal Flourish 1"
2Crafty Chipboard "Formal Flourish 1"
Riddersholm Barn Market Paper Collection  - The Barn BM0174
Petaloo Flowers Suga Red - Mini Royal Blue 1131122
Petaloo Mixed Textured Mini Blossoms- Black 1263209
Prima Blue Millicent Blue Meadowlark 556167
Petaloo  Flowers 564414
13 Arts  Mist - Chalk Indigo
13 Arts Matte Black Acrylic paint
13 Arts Ayeeda Ink- Water Ink in Silver
Prima Clear Stamp 960896
Prima SIIC 573164
cardboard
gesso
Ranger Archival Ink - Black


Flying Unicorns Small Art Big passion Canvas


Welcome to the Small Art Big Passion 

http://www.flyingunicornstore.com

I'm here today to show off the Small Art Big Passion mini-kit.  It's my favorite kit bundle each month.  It's all about the love of making cards, tags atc's and anything in between. From Stamps, flowers, paper, embellishments and pretty things in between! These yummy goodies will enhance any of the kits or stand alone . There are so many options for this mini kit, so I created a small 6x6 canvas.  

This month's paper collection included in the Small Art Big Passion is the BoBunny Juliet collection. 
This collection has rich warm tones, perfect for the season. 

I'm going to walk you through my steps for this project.  Lots of time, projects look far more complex than they really are , so breaking the projects into steps is very helpful. 

Here are some close ups of the canvas before I dive into my step-by-step.  


So let's see how I made this

As I said earlier, I am creating a 6x6 canvas board.  
I grabbed the Prima 6x6 stencil - Doily 1 from the Unicorn store and slathered on the heavy gesso.  I prefer to use heavy gesso for stenciling over molding paste for the simple reason that the heavy gesso tends to stay white.  I have found that molding paste can pick up/absorb the colors from the paper or canvas.  When I want white, I Like my mediums to stay white. 

Note: if you want to use molding paste for stenciling and would like the medium to stay white, just add some white acrylic paint or regular white gesso and mix it into the molding paste. You can add other colored acrylics to the gesso as well for other projects. 


After the heavy gesso has completely dried, I cut the stenciled design out - sort of like a wreath.   It's so pretty, isn't it? 

I am a big fan of inked edges, and this project is not going to escape without some edge inking.  I also ran my ink pad lightly over the top of the dry stenciled design to give the top of the stencil some light definition. 


At this point, I glued the doily onto some cardboard and cut it out as well.  I want some dimension to the canvas. 


Set the doily aside  -time to start the canvas background.  I glued a piece of the BoBunny Juliet paper to the canvas using Soft Matte Gel.  I applied a layer of soft matte gel to the canvas using a sponge brush - made sure it was bubble and ripple free, then added a layer of soft matte gel over the top.  

Ahhhhhh so why did I use Soft Matte Gel medium instead of glue?  Great question.  I prefer using the matte gel medium to adhere my paper to canvas because I feel it provides a smoother surface - less bubbling , less ripples, less curling of the edges on the paper. The project ends up looking polished and professional and nicely finished.

Glue does work great - don't get me wrong, but we all have preferences. 
Once nicely dried, I inked the edges and some random accent spots.  
Next I need to work on the Julie Nutting wood doll shape. They are very sweet shapes and have beautiful natural wood finishes so you don't really even need to paint or color the dolls.  I gave mine a blush of color with Prima watercolor pencils and chalk edgers. 

First, let's talk about the the watercolor pencils. Watercolor pencils are very pigmented so a little goes a long way, meaning color a bit and and then blend with the water brush.  You can always add more color is you want, to enhance.   The waterbrush does all the work in activating the pigment from the pencil. 


Next I colored the doll's hair and shoes by dipping the tip of the waterbrush into the Prima Chalk Edgers by Ingvild Bolme.   It's a great way to add some color and to control the amount of color you add. 

Time to decorate and finish up the canvas.
I decorated with flowers, and Flying Unicorn metal adornments and the wood embellishments that came with the wood doll. These are goodies that came in the  Small Art Big Passion

After the canvas has been decorated as desired, I added a finishing touch - using thin gold braiding ( from my stash) around the inside of the doily.  

Here is the finished canvas.  


Plan a day trip! Crops -Classes-Fun

926 North Monroe St   
Tallahassee, Florida
Tel: 850.270.6366 Toll Free 800.231.7119

Supplies:
Flying Unicorn - Small Art Big Passion  December
 Prima 6x6 stencil - Doily 1
Ranger Tim Holtz - Vintage Photo  and Walnut Stain
Petaloo Burlap Flowers - Natural 120800
Petaloo Suga Reg Mini Royal Blues 1131122
Prima Julie Nutting Doll - Wood Doll 910662
Prima Soft Matte Gel
Foam Brush
6x6 Canvas Board
Flying Unicorn Metal Adornments
Floral Berries
Gold Braiding
BoBunny Juliet collection 6x6
Prima Water Brush
Prima Watercolor Pencils
Prima Chalk Edger

Tuesday, December 1, 2015

Flying Unicorn Small Art Big Passion Card Acorns


This is December's Small Art Big Passion for Flying Unicorns.  It's a fun little mini kit  - made especially for card, tag and small project crafters.  

The papers this month are BoBunny's Juliet collection - and quite a versatile collection, I must say.  I decided to use the papers for a  much needed Thank You card.  Tis the season for being thankful - though a nice card  thanking someone is always in season. 

My sweet little Acorn die is from Spellbinders.  Darling, isn't it? 

As I am looking at this card, I realize there is not a lot to this card- some acorns, leaves, a border with some stamping.  Cards do not always need to be totally covered from corner to corner with embellishments.  Yes I adore flowers and trims, but sometimes I need to back away from the crafting table and tell my crafty little fingers to just stop!  They rebel at times and do not listen to my brain, but they are learning.  

Thanks for visiting my simple little card today to see what can be created with the Small Art Big Passion for Flying Unicorns

Products:
Small Art Big Passion for Flying Unicorns
BoBunny Juliet collection 6x6
Ranger Gold Stickles
Prima Stamps Stitches - 570514
Dovecraft Curiosity Corner Clear Stamp Sentiment DCC5008
Ranger Tim Holtz Distress Ink - Mahogany , Vintage Photo
Spellbinders Acorn Die S2-191
Hemp Cord
Gold Glitter
Floral Berries
Martha Stewart Edge Punch