Showing posts with label seascape. Show all posts

Monday, May 10, 2021

Seascape Cards - Spellbinders Card Kit of the Month - May 2021


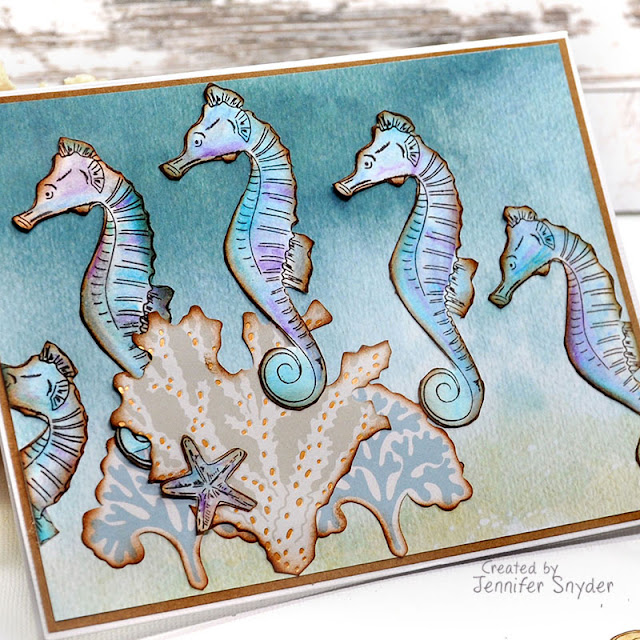
Seascape and Seahorses - Cards using Spellbinders Card Kit for May

The ocean is a peaceful relaxing escape for so many people.  That's why it makes for such a great project theme.  Stressed out people need products that bring peace.  Stressed out people need greeting cards that deliver a slice of calm and tranquility. 

  Spellbinders Card Kit of the Month Membership for May 2021 is a box of crafty seaside tranquility delivered to your door.  Here is a picture of the entire kit this month.  The two cards featured today were created using the die cut designs and stamp set from the Card Kit.  

Card Kit of the Month Membership
The stamp set this month is just sensational.  
It's a combination of sentiments and images that will please anyone; from Birthday greetings to everyday sentiments and some sea critters tossed in as well.  


Additional Information

The seahorses and starfish  stamps were stamped on to watercolor paper using the MISTI 12 x 12 - Most Incredible Stamp Tool Invented stamping platform and colored using Spellbinders / Fun Stampers Journey Color Splash Watercolor Pencils

These pencils are amazing.  The set has an array of colors that capture most every color I need.  The pigmentation is rich and blends so wonderfully.  I do use a paint brush for blending.  I have yet to find a water brush pen that I like.  

Journey Color Splash Watercolor PencilsMemory MISTI 12 x 12 - Most Incredible Stamp Tool Invented


This card utilizes a dimensional shell sticker included in Spellbinders Card Kit  for May, along with the die cut images and the stamped sentiment from the kit.   


A little bit about the monthly "Extras" Spellbinders offers for sale in their on-line store. 

  The "Extras" are the packaged die cuts and the paper pad from the kit that can be purchased individually from Spellbinders. Here's a link to this month's Extras from the Spellbinders Store.  Each month the selection of extras changes.  


Beach Day Gemstones - Card Kit of the Month Extras
Spellbinders Beach Day Gemstones - Card Kit of the Month Extras
Beach Day Die Cut Shapes - Card Kit of the Month Extras
Spellbinders Beach Day Die Cut Shapes - Card Kit of the Month Extras


Remember,  Spellbinders monthly club dies are uniquely designed for Spellbinders and only found in their store.   


Saturday, September 15, 2018

Beach Themed Card and Tag - Creative Embellishments


Welcome to Creative Embellishment's Birthday Beach Challenge

Happy Birthday creative Embellishments.  Join us at the Facebook Event page here 

In celebration of Creative Embellishment's Birthday, I am hosting a beach challenge - found right here

The Rules: 
 There are no rules other than to present a NEW creation featuring the ocean/beach/ sea....you've got the idea.   You DO NOT have to use Creative Embellishments chipboard to enter the challenges.  However you cannot combine CE challenges.  
This event is meant to Thank Customers and Introduce others to the product.   

 All the Challenges are listed on the   event page found here.  
Enter as many as you like.  There are 7 challenges and a total of  8 chances to win. 
  
The challenges are open until 11:59pm (EST),  Monday Sept. 17th 11
All projects must be uploaded to the Fan page by that time.  
Be careful of Time Zones. 

Prize for the Beach Challenge
The winner of my beach challenge will win the following price.  
I know, right?  Look at all the fabulous chippies. 


These are the chipboard pieces I used on my card and gift tag.  They are lightly dabbed with creamy white paint.  


My paper choice is Stamperia's Sea Land collection.  It's peaceful, relaxing and refreshing. 

Thanks for playing along with Creative Embellishments.

Remember to add your work to the  Creative Embellishments  Birthday  Event Page or simply stop by and see how great the chipboard is.  


Products Used: 
Stamperia Sea Land paper collection

Sunday, June 24, 2018

Light House Sea Canvas


I love the sea.  It's peaceful and calming for me so I  tend to create what soothes my soul.  If you love the sea, then Creative Embellishments has chipboard pieces you will adore.  

I'm combined my love of sea and chipboard.    
This started out as an 8"x 10" canvas but after finishing it, I wanted to add a weathered frame for hanging.  The canvas rests on top of the frame - meaning the glass has been removed.  


These are the Creative Embellishment chipboard pieces I used on this framed canvas wall hanging.   


Here's How I created the Lighthouse

Below is a quick glimpse of how I created the lighthouse.  The package of chipboard lighthouses comes with a set of four unique lighthouse shapes.  Select two of them and do not agonize that they are different.   Don't let that stress you out....you are an artist - let nothing  with a peaceful purpose  throw you off. 
Besides you'll never know they are different after you glue them together.  

Step 1.  Dab two  lighthouse chippies  lightly with whitewash ( white acrylic or gesso mixed with water to thin it out).    I used a sponge because it dabs so much better than a paint brush - but use whatever is easy and handy.  

Step 2.  Select which lighthouse you want as the bottom  and set aside.  
Pick up the second lighthouse - the top lighthouse - and mark off 1/2 inch sections  with a ruler and pencil.  

Step 3.  Lightly fill in  sections of the lighthouse with some blue ink .  I left the pencil lines because they added cool structure when colored ink was added.  Plus I liked the look.  

Step 4.  Lightly ink one edge of each lighthouse with brown.  This will add dimension.  

Step 5.  Time to glue the lighthouses together.  I glued the bottom one a bit off center to create dimension and shadows in the windows, at the top, and at the bottom.  I think the effect is very cool.  I'm happy.  

Here are some images of the finished lighthouse piece.  
The paper and sweet sea gulls are from Stamperia paper .   I simply cut them out and added some hemp cord for salty seascape effect. 

As I mentioned above, after I completed the canvas, I wanted a bigger piece for my wall.  The actual canvas is 8x10.  I shopped around for a frame that was worthy of a salty seascape.  This wooden frame looks as if it were made from  weathered wood.  Perfect.  

All I did was set the canvas on top of the frame and glue in place.  I removed the glass to make the frame lighter for hanging.  


 Thanks for stopping here today.  


Where to shop? 
You can shop for Creative Embellishment chipboard and products right here .
You can shop for Stamperia papers right here


Creative Embellishments