Showing posts with label patchwork. Show all posts

Tuesday, September 3, 2019

Apple Shaker Cards - Creative Embellishments and Buttons Galore


Back to School - Apple Shaker Cards

Back to school means new beginnings, growth, change and hope.  This time of year brings both joy, and anxiety for parents, teachers, administrators and students.  I created some cards to encourage and support folks who have mixed emotions to have hope and believe this year will be successful, wonderful and filled with support from loved ones.

It's also the start of a new month and time for a new monthly challenge at Creative Embellishments.
Welcome to September's Challenge.
Interpret this image as you will but don't forget about the twist..to add circles or something round.

I'd like to share my projects for the September challenge at Creative Embellishments.  I interpreted this with a "back to school" theme.  With that, I featured the fabulous new apple shaker design by Creative Embellishments.
apple shaker design

My cards actually share the same shaker pieces - with one card using the layers from the set and the second card using the bottom solid base of the shaker set.

I really liked the papers I used and didn't want to cover the paper with the large chipboard piece, so I opted to use just the layers for the shaker card. 


The shaker mix on this card is from Buttons Galore and More/28 Lilac Lane.  It's a rich blend of traditional round sequins, and sweet little flower shapes. This mix is Buttons Galore - Sequin Mix - Coral.
Coral Sequin Mix

*********************************************************************

The second card utilizes the leftover apple chipboard shape from the shaker set, simply painted red and embellished with a bit of gold. 
The solid apple shape also has been embellished with one of the fabulous rubber stamps designed by Creative Embellishments, the Grunge Music Note Sheet stamp


This is the fabulous stamp used - Creative Embellishments - Grunge Music Note Stamp.

  Patriotic Slider Pop-up Card


My paper choice for both cards is from Stamperia PATCHWORK 12x12 Paper.  I find this collection to be heartwarming and soulful.

Stamperia PATCHWORK 12x12 Paper sbbl49


Thanks for stopping here today.  Happy Crafting.  Don't forget to check out all the new shaker mixes at Buttons Galore and More/28 Lilac Lane as well as the newly released chipboard shaker designs at Creative Embellishments.  


Shop Here
*********************************************************************
Stamperia PATCHWORK 12x12 Paper sbbl49


Coral Sequin Mix
apple shaker design
Creative Embellishments - Apple Shaker Set
*********************************************************************************

Creative Embellishments Shakers
*********************************************************************************


Tuesday, February 23, 2016

Bunny Home Decor


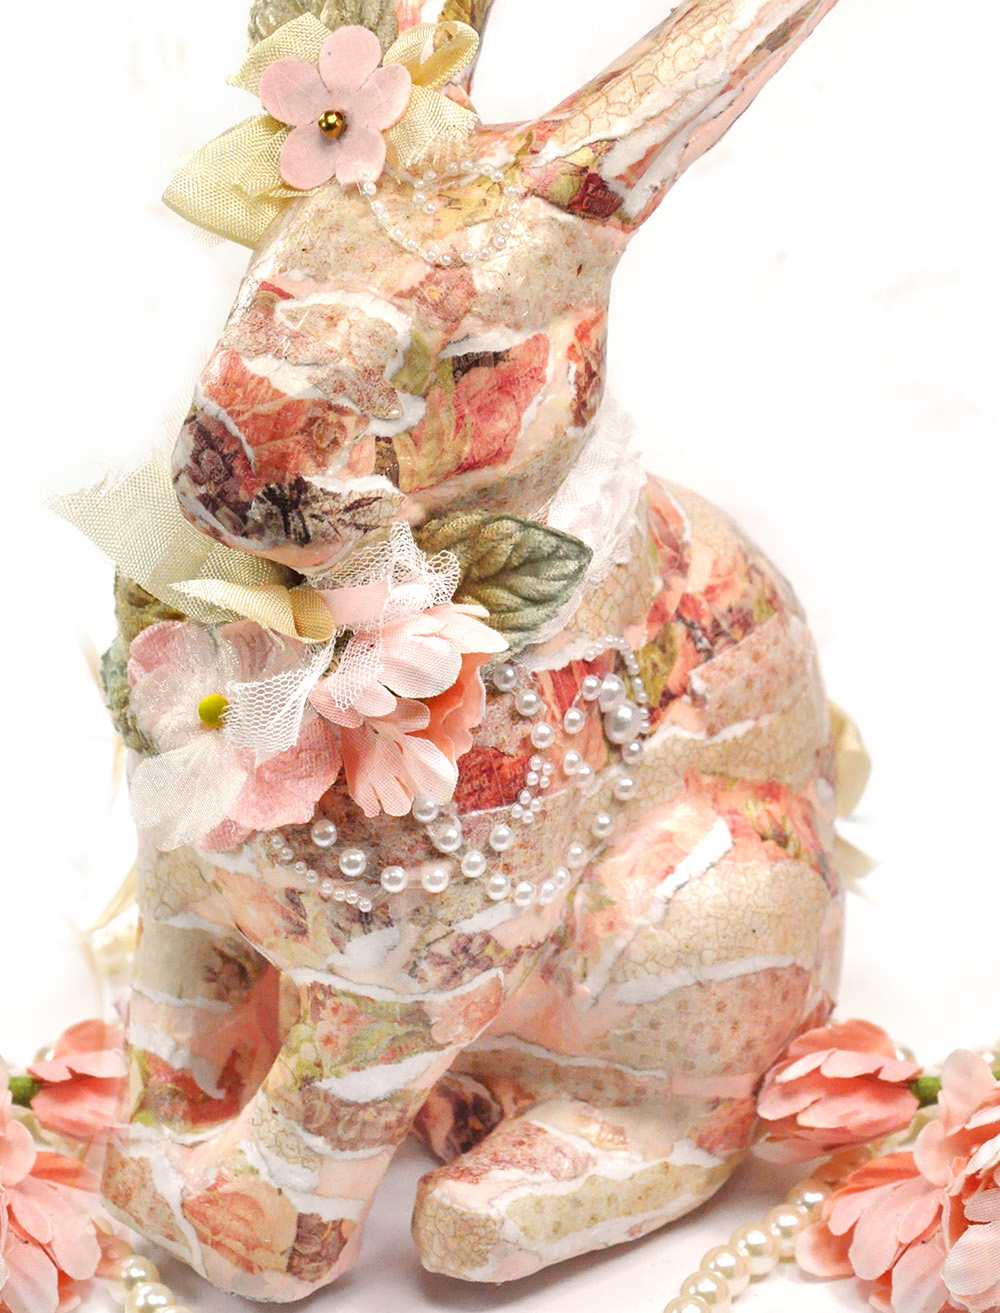
Prima's collection,  "Tales of You & Me", created by Frank Garcia, is one of those collections that is totally sensational and a "must have" for your stash.   ( You can see the original post for my bunny at Prima's blog, right here)

I made this sweet little  patchwork bunny with Easter in mind.  It will look great on the table with some flowers.  

I shared my instructions and some photos of the process which you'll find  if you scroll down.  This bunny is remarkably easy to make.  This is a simple process, but I cannot lie - a messy one.  First though, here are a few more close ups.   


Here is a head shot.  You can see his sweet little face.  To be honest,  it looks like he has an eye and a darker nose.  Totally unintentional.  It's really where the papers ended up but they do look perfectly placed.  I promise I'm NOT that detail oriented. 
I used the Memory Hardware by Frank Garcia - Petite Rosette Trim for the bunny's neck.  It's tiny and delicate and just what an Easter Bunny would wear.  
Here is his side profile. 

...and his darling puff bunny tail  made by using Memory Hardware by Frank Garcia - Grand Rosette Trim.

How did I make this?  

This is the plain paper mache bunny that I started with.  
I painted the paper mache with some gesso.  I used Heavy White gesso  and added a bit of water to thin it out.  After I painted it,  I mixed some Prima Chalk Board paints together to make a blush pink color.  

I did this because I wanted to create the patchwork bunny.  I knew there would be some bare uncovered spots and I didn't want gesso to show.  I thought the blush pink would be prettier as a base color and would blend with the papers better. 

I ripped a bunch of thin strips from the "Tales of You & Me" collection.  I kept  them very small. As I started the project, I noticed that big wide pieces of paper would not form nicely around the  paper mache and lie flat.  

The key to this project is to mist the papers with water and get them wet enough to bend - yet not dripping.  The paper needs to be flexible in order to drape smoothly over the bunny shape.  

 The second step is to coat each paper strip with  Finnabair's Art Basic Soft Matte Gel Medium.  Using matte  medium is important to me because I'm not a glossy gal.  I do not want my final project to shine.  I want it to be a nice subtle table decoration.    The Matte Gel Medium acts as a glue and securely adheres the papers as long as you coat each piece of paper with gel.  

Pay special attention to the ears and the direction you want your paper pieces to set.  I wanted my ears to be long  so I made sure my paper strips were adhered  length wise.

 Working in small sections one piece of paper at a time:

  • cover little spots on the bunny with Soft Matte Gel
  • add a small piece of paper
  • Cover the paper with soft matte gel

Yes I did this with my finger tips, though the foam brush works well.  I just get into a zone and forget the foam brush is sitting next to me.  But this is exactly why I say this project is messy!  Far less messy with the foam brush I imagine...though I guess I wouldn't know.  

 After the bunny is covered with strips and gel, let dry before you start top embellish.  The paper rips and tears easily when wet - so it's better to be safe. 
See how easy?  Embellishing is left up to your wonderful imagination.  

Thanks so much for stopping. 


Products:
990824 Prima Tales of You & Me paper - Belles Melodies d Amour
990817 Prima Tales of You & Me paper - Contes de Toi et Moi
529338 Prima SIIC
990466 Prima Memory Hardware by Frank Garcia - Grand Rosette Trim
961428 Prima Finnabair Art Basics -Soft Matte Gel.
990459 Prima Memory Hardware by Frank Garcia - Petite Rosette Trim
564452 Prima Flowers - Lyric
575311 Prima Flowers - Something Blue
580667 Prima Flowers -Butterfly - Bette

Other:
Ribbon