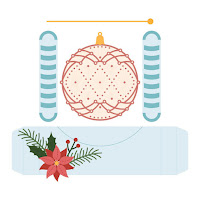
Authentique Believe Collection: Poinsettia Card
I have a 2 part series of cards and tutorials I made for the Flying Unicorns using Authentique's paper and Petaloo flowers. This is Part 2. You can find Part 1 right here featuring this card - with tutorial.
This bright and cheery ornament shaped card was created using Authentique's Believe 6x6 paper pad. While I understand the traditional colors of Christmas are red and green, these colors were so much fun to use from this paper pad - happy , joyful and really inviting. Thus I made an equally fun card befitting the papers. The Petaloo flowers chosen for this card match perfectly.
Here is a close up of the floral cluster of my ornament. Scroll down and I'll show you how to assemble this. Easy DIY instructions will get you on your way rather quickly.
This card was made using a pre-folded cream card size 5in x 6.5 the the fold ending at the top of the card - at the top of the ornament. The card flips up to open.
I have a template that you can download as well right here.
Step 1. For this card , you will use a folded piece of cardstock or a pre-folded card. Align the template with the fold in cardstock.
Cut the template out being mindful of the fold. The card is designed to flip open upwards. You want to make sure the fold is not cut. The diameter of the card is 4.75inches.
Cut the ornament topper along the fold as well.
This is what the base of your card will look like - flipping upward to open.
Step 2. The second circle on the template is for the decorative layers on the card. Use the template to cut the smaller circles that you will use on the ornament. 
TIP: If you do not have a circle cutting tool - I suggest cutting your stack of circles all at once so they are the exact size. When I cut the paper border strips to decorate the ornament, the edges lined up perfectly because I had cut all the circles at the same time.
Step 3. Next add the strips and borders to the card as desired...ribbons, punched strips...whatever. Problem with circles is that you have that wretched arched edge to combat when cutting your borders. But don't stress over the the sizing or the length and forget about that ridiculous arched edge.
Why?
Because I'm going to reveal the BEST CIRCLE TRIMMING TIP EVER.
BEST CIRCLE TRIMMING TIP EVER:
Step 4. Create leaves from the green flowers in the Petaloo Mulberry Street Mini Delphinium Green/Brown/Orange/Burg. These are gorgeous and perfectly matched and so easy to make.
Simply add a dab of glue to the green flower and pinch the petals together with your fingers. BAM custom leaf.
Step 5. Start the base layer of the decorations. Add some red sequin trim and pinch in the middle to give it more shape.
Step 6. Add the flowers, tuck your newly created leaves into the cluster and add some floral berries.
Step 7. Time to add the ornament topper and string to hang the ornament. Locate the top of the ornament circle...this should be where your card folds. Match the folds on the card to the ornament topper.
Tie a small piece of cording to form a circle. Tuck the cording between the topper, add glue and fold the topper closed over the cord. The glued topper will hold the cord in place for an actual ornament to hang on the tree.
Thanks for visiting. Have a Merry and Bright Christmas full of joy, peace and love.
Authentique Believe collection 6x6
Kaisercraft Pearl Strips
1/2 inch solid wrinkle ribbon
Waxed Cording - Red
Petaloo Flora Doodle Candies Poinsettia Green 1284-211
Petaloo Mulberry Street Mini Delphinium Green/Brown/Orange/Burg 1300-100
Petaloo Darjeeling Tea Stained Dahlias Red 14670101R
1.5inch Olive Tulle
Green bead trim
Prima Memory Hardware Red Sequin Trim 990596
Scalloped Lace
Red and Green Floral Berries
Pre-folded cards and envelopes 5in x 6.5in
Tim Holtz Distress Ink - Walnut Stain
Martha Stewart Edge Punch - Doily Lace Edge