Tuesday, October 3, 2017

Spooky Halloween Card - With a Surprise Inside


Halloween season is upon us.  
October means time to make some Halloween cards and decorate the house with autumn/Halloween decor. 

Have you seen some of the new releases from Spellbinders for Halloween and the upcoming Holidays? And who can resist Holiday dies?  Not me.  

These are the dies I used on this card.  I turned the beautiful gate into a spooky spectacle.  

 I realize  Spellbinders Card Creator Gate Die was probably designed with beauty and elegance in mind, however it really does make the perfect haunted gate. 

The fun thing about the gate die is that it swings open to reveal Spellbinders Haunted Manor Die.   
I also used some foam tape to make the cat pop up a bit.


So why isn't my cat black?  Great question.  
 I did not make him a black cat because he would have blended right into the fence. That's not fun. 

Here's a closeup of the little Halloween darlin - just itching to get into the gate to hunt for Halloween mice and rats. Deeeelish. 
Swing the gates open and voila! More creepy Spellbinders shapes. 
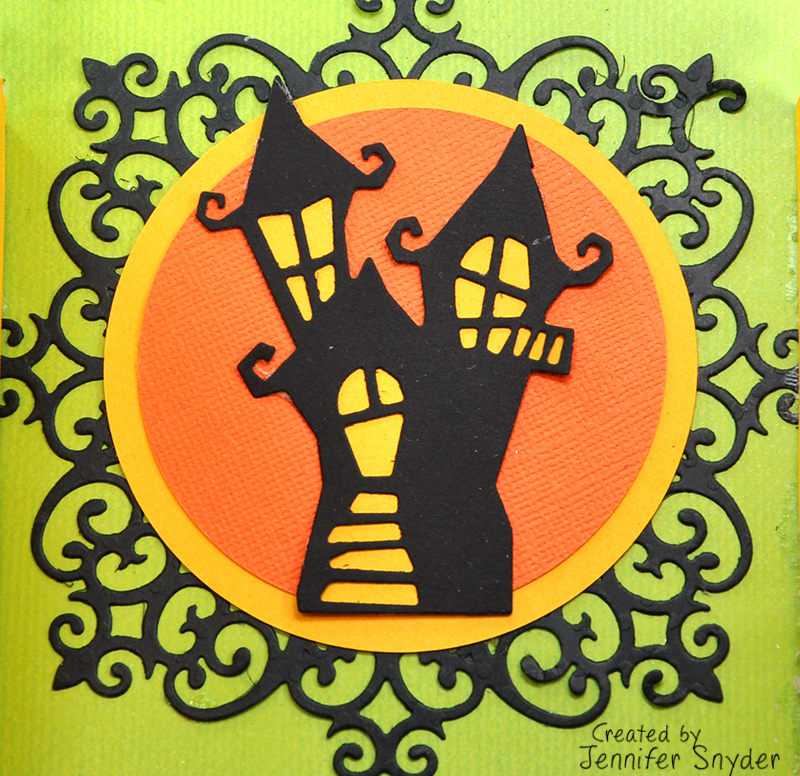
The house is framed with the decorative Spellbinders Victorian Medallion.


Thanks for stopping here at my blog.  


Spellbinders Card Creator A2 Gate Gatefold EtchedDies SKU: S5-286
Spellbinders - Die D Lites Cats 'n Bats Holiday 2017 Etched Dies S2-282
Spellbinders Shapabilities - Victorian Medallion Two - S4-443 
Spellbinders Card Creator A2 Gate Gatefold EtchedDies SKU: S5-286

Saturday, September 30, 2017

Blooms Card Using JustRite Rose Stamp


Having more fun with the new stamp set from JustRite Papercraft - Multi Step Three Way Rose Clear Stamp .
I'm finding this to be such a versatile stamp set. 

I also grabbed a wonderful sentiment from  the JustRite Papercraft - Geranium Heart Song Clear Stamp.  It's featured in the photo below so you can see the variety of sentiments that cover so many situations. 

As I mentioned, I am having so much fun figuring out different ways to use the Multi Step Three Way Rose Clear Stamp.
Here are a few other ideas I came up with for this stamp set: 

First is a simple holiday wreath.  This is perfect for any season.  You can see the original post on my blog here. 

Next, I stamped up a fun snowman.  You can see that post right here. 

So let's go back to the card design for today's post.  

 I stamped my design onto Specialty Stamping Paper for Inks . I find this specialty paper has a smooth slick finish which is perfect for Distress Inks.  I like to use those small finger sponge daubers to help me isolate the Distress inks when I color. 

The greens were painted with some watercolor paints and a Watercolor Brush. 

  These are the Distress inks used on this card:


After adding some inexpensive floral berries from a craft store, I dabbed the branches and roses with  Stickles Glitter Glue  in Diamond and Stickles Glitter Glue - Lime Green .  The effect looks so much more impressive in person, trust me.  It's a bit of sparkle without being over the top like glitter can be sometimes. 

Thanks for stopping by.  I really appreciate your time. 
You can shop for all your JustRite Stamps and dies right here.  

Ranger Tim Holtz Distress Ink - Festive Berries
Ranger Tim Holtz Distress Inks MINI - Spiced Marmalade
Ranger Tim Holtz Distress  - Picked Raspberry 
Ranger Tim Holtz Distress Oxides - Vintage Photo
Specialty Stamping Paper for Inks 
Stickles Glitter Glue - Diamond
sponge daubers 
Liquid Pearls in Garnet

Thursday, September 28, 2017

Autumn and Winter Wreath Cards Using JustRite's Rose Stamp


Holiday Wreaths from Roses?  


I am really enjoying  JustRite Papercraft's new Multi Step Three Way Rose Stamp. I love it so much that I made the same card and experimented with color - for winter and Autumn. 


I also used this cool stamp set to make a snowman.  You can find this post right here. 
First is the autumn card - with bold oranges and yellows. 
 I stamped my wreath onto Specialty Stamping Paper for Inks . I find this specialty paper has a smooth slick finish which is perfect for Distress Inks.  

I like to use those small finger sponge daubers to help me isolate the Distress inks when I color. 

  I colored it with a variety of Distress inks

And here is the same card without the ribbon - for easy flat mailing. 


Next card is in festive winter purple and blue. 


This card is also colored using Distress Inks on Specialty Stamping Paper  with some extra embellishing - gold lace flowers from Prima (Memory Hardware Cours Mirabeau Floral Lace)

After adding a few aqua gemstones, I bedazzled a bit more with Stickles Glitter Glue  in Diamond.  The effect looks so much more impressive in person, trust me.  It's a bit of sparkle without being over the top like glitter can be sometimes. 

I used the following Distress Inks for this card:


Thanks for stopping by.  You can shop for all your JustRite Stamps and dies right here.  


Ranger Tim Holtz Distress Inks MINI-Salty Ocean
Ranger Tim Holtz Distress Inks MINI - Mustard Seed
Ranger Tim Holtz Distress Inks MINI- Blueprint Sketch
Ranger Tim Holtz Distress Inks MINI - Spiced Marmalade
Specialty Stamping Paper for Inks 
Prima (Memory Hardware Cours Mirabeau Floral Lace)
Stickles Glitter Glue - Diamond
Ranger Tim Holtz Distress Ink - Twisted Citron
Ranger Tim Holtz Distress Ink - Squeezed Lemon

Simply Cool Snowmen - Snowmen Made from a Rose Stamp


Snowmen from Roses?  

Is it really possible to turn a Rose stamp set into a wonderful snowman?  Absolutely possible with JustRite Papercraft's new Multi Step Three Way Rose Stamp.

These are the coolest snowmen I've ever made without being made from snow.  Actually I prefer the kind made from paper because then I know I only had to stamp, cut and glue instead of shovel, bundle and freeze.  

I've provided a quick look at how I made my snowman using the dotted circle stamps as his body and the branches as his arms.  

In the stamp below, I also used the Justrite Small Oval Christmas Tidings Clear Stamps for the snowflakes as well as 
JustRite Confetti Trio Background Stamps for the dotted blue background.  


As I mentioned, the blue dotted background stamp is from JustRite : JustRite Confetti Trio Background Stamp CL-05091 - stamped using a blend of Distress inks:


My "secret sauce" on this card is the eyelash yarn I used for a cool effect.  OK I have to admit this came from my stash and is a few years old.  It dates back to when everyone was making trendy scarves from eyelash yarn.  
I did not make scarves - I just buy stuff....and store stuff.....for a very long time.....hahahaaha


_______________________________________________________________________________
Next up, my second snowman - slightly different. Made using Maja Design papers from Sweden, they are the perfect snowman colors. 
Maja Design -  

(You can grab your Maja Design papers from Frantic Stamper - here). 

 No eyelash yarn trim, but instead I used cheesecloth and some "shaved ice" -Stampendous Frantage Shaved Ice.   
As you can see below, I layered him.  I stamped a layer of circles plus his arms, then decided I needed some dimension.  I cut an additional snowman out and popped him up with pop dots adhesives. 


Thanks for stopping today.  

Justrite Multi Step Three way Roses Clear Stamps CR-05501
Justrite Small Oval Christmas Tidings Clear Stamps - CR-05098
JustRite Confetti Trio Background Stamps - CL-05091
JustRite "A Smile is Contagious" Stamp set - CR-05106
Archival Ink - Coffee
Memories Ink - Chestnut
Sequins
eyelash yarn
cheesecloth
Maya Design