Showing posts with label . DIY Christmas decorations. Show all posts

Wednesday, December 2, 2020

Christmas Pickup Truck with Shaker Greeting - DIY Home Decor (With Instructions)


Christmas Pickup Truck - DIY Home Decor

Hello friends.  Today I'm in the Christmas decorating mood.  I created a wooden home décor piece  for my front door using Creative Embellishments wooden Home Décor pieces.  Scroll down to see the tips and DIY instructions to make these pieces.  

 The Creative Embellishments wood décor collection has a wide variety of  original designs ranging from holiday to coastal.  If you have not seen them yet, take a moment to check out the amazing selection of unique designs ready to be decorated.  

Creative Embellishments - Truck Back?limit=100

The Pickup Truck Back 

Let's start with the wood home decor Truck Back.  This is laser cut and etched 3/16" thick plywood and is clean, smooth and ready to be altered any way you choose - paint, paper, whatever. It's also quite large measuring 11.9"w x 10.7"h making this perfect for front door decor, as a wall hanging, table top conversation piece or gift.  

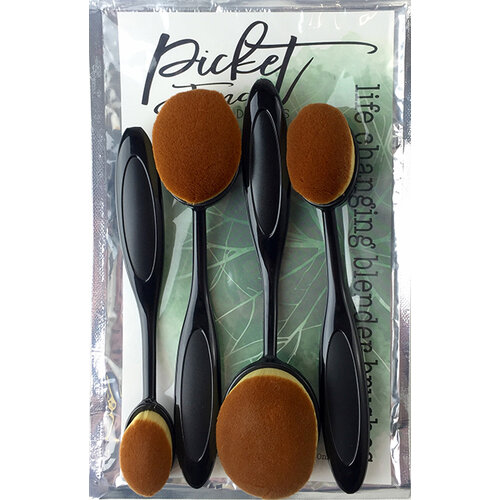
This was painted with basic acrylic paints then sanded in places to add back the worn rustic look.  Next step in the process - inking with Black Soot and Walnut Stain distress inks to create shading and depth.  I do love  using Blending Brushes for shading the wood decor pieces because the blending brushes provide a smooth feathered transition on the project.  

Chipboard Decorative Pieces  - The Trees and Wreath

The following chipboard pieces were used to decorate the truck: Christmas WreathsMini Wreaths, and tall pine trees.  The pieces were painted with acrylic paint and texturized by mixing Forest Moss Distress Paint with clear 3D Gel or Heavy Body Gel  ( or clear translucent molding paste).   

 Creative Embellishments - Christmas Wreaths?search=wreaths
Creative Embellishments chipboard - Christmas Wreaths
Creative Embellishments - Mini Berry Wreaths?search=wreaths
Creative Embellishments - Tall Trees.html?search=tree
Creative Embellishments Chipboard - Tall Pine Trees


Before adding the trunk layer to the wood base, the trees were glued down and brown/black gingham fabric tucked into place for vintage appeal.  
To compensate for the extra bulk  of the trees and fabric, and allow the trunk piece to lie flat, I added a large piece of cardboard  for support and level out the trunk piece. 


Creating the Wreath Shaker
I added a fun shaker to the trunk by combining two of the chipboard pieces from Creative Embellishments:  Christmas Wreaths and  Mini Wreaths.  While these are not shaker sets, they are easily transformed into shakers by cutting a middle layer of foam and adding an acrylic window.  

Special Note:  Do not stress over matching up the berries on the wreaths.  The wreath looks fuller and more dimensional when the berries on the bottom layer do not align with the berries on the top layer.  

Below is a photo showing the process.  


The Shaker Mix and Button Embellishments

The secret to a fabulous shaker is the magic of the shaker mix. The wreath shaker is filled with Buttons Galore DooDadz in Merry MimosaDooDadz are new at Buttons Galore and spectacularly fun.  They combine iridescent "confetti" pieces with beads and flat diamond cut gems.    

I tossed a few buttons from Buttons Galore Shaker - Dragon Fire Bottle Mix  into the shaker before closing up.  


Finishing Touches

Finishing touches on the shaker wreath include adding some gems from Merry Mimosa DooDadz , some red buttons from the Dragon Fire Bottle Mix, and a small gingham bow. 

Special Note:  I used wire to attach the buttons to the shaker wreath for durability. 


Thank you for stopping here today.  I appreciate your time.  


Monday, November 23, 2020

Christmas Shadow Box Makeover - Spellinders and Authentique


Hello friends. Today I am sharing a dramatic Christmas DIY home decor makeover made using some products that make a perfect pairing;  Authentique's Christmas Greetings collection and coordinating Authentique's Spectrum solid colors collection accentuated by Spellbinders Amazing Paper Grace (APG) Die of the Month  for November.  

The idea was to take a boring wooden plaque and turn it into a dazzling shadowbox.  Scroll down the blog page for the instructions. 

Below is the image for the gorgeous APG Die of the Month for November from Spellbinders.  The APG stands for Amazing Paper Grace designs by Becca Feeken.  The photo is from Spellbinders and is the sample image for the die.   

Amazing Paper Grace Die of the Month Membership

Below are the Authentique products used on the Christmas Shadowbox:   Authentique Paper - Christmas Greetings Collection - 12 x 12 Paper PadAuthentique Paper - Christmas Greetings Collection - 12 x 12 Double Sided Paper - Number Four, a mini ephemera card from Authentique Paper - Christmas Greetings Collection - 6 x 6 Paper Pad.  I also used two sheets from Authentique's Spectrum paper pad: Lady Bug and Crocodile Smile. 

Authentique Paper - Christmas Greetings Collection - 12 x 12 Paper PadAuthentique Paper - Christmas Greetings Collection - 6 x 6 Paper PadAuthentique Paper - Christmas Greetings Collection - 12 x 12 Double Sided Paper - Number Four


I am always on the hunt for clearance and discounted home decor pieces at big box stores and thrift stores that I can flip around and use as shadowboxes.  I'm interested in wooden frame type items that are deep enough to gussy as I want.    

 Today's featured piece was found at a big box national chain (on sale of course) and it has rich brown wood sides so I really don't need to do anything to the wood frame.  

I have some simple instructions to show you this dramatic transformation.  


Step 1.  Flip frame around to decorate the inside.  Cut the Authentique Paper - Christmas Greetings Collection - 12 x 12 Paper Pad to size and glue.  


Step 2.  Add trim or decorative cording around the inside edges of the box to hide the imperfections.  My favorite trick to use to make the project appear finished and polished. 

Step 3.  Fill the box with embellishments.  Die cuts, tree, flowers.  I also cut a mini ephemera card from  the Christmas Greetings Collection - 6 x 6 Paper Pad to convey the Christmas message.  There are so many great ephemera cards to choose from in the collection. 

Step 4.  Finishing touches - include gold floral berries, pearls for the tree from Buttons Galore (Pearlz),  and 3D Holly Buttons and gift buttons from Buttons Galore.  

Step 5.  Final step was to add ribbon around the outside of the box.  


This image below shows some of the details and embellishments used on the shadow box.  
The dies used are included in one die set from Spellbinders (APG Die for November).  This set has the fabulous festive poinsettias and greens along with the ornate sleigh.  

Next I used a white decorative tree and glued in with very durable glue (Beacons 3 in 1).  I added the Buttons Galore (Pearlz) to the tree as a subtle decoration. 


Buttons Galore -Traditional Presents Cm127Buttons Galore -Pearl Drop Pz105Buttons Galore -Holly Cm129


The next two images shows the ribbon added around the outside of the box.  


Thank you for stopping here today and happy crafting.

Supplies: 
Gold Floral Berries
Beacons 3 in 1 glue
Wood Decor Shadow Box