Showing posts with label wood. Show all posts

Tuesday, February 11, 2020

Wood Love Shaker Decor - Table Centerpiece for Valentines Day - Tips


DIY Decorated Love Table Centerpiece Decor

I'm getting ready for Valentines Day by making a DIY shaker home decor piece to hang on my wall.  To be truthful, I was going to gift this to my friend, but I can't part with it.  Is that bad?  Don't judge me...haaaaaaaa.  We all fall in love with some pieces and can't part with them.  

This was also made for the monthly challenge at Creative Embellishments, with the theme of love.  Below is am image of the challenge board - provided to help inspire.


Each month there is a twist included in the challenge and this month, the twist was to add flowers to your project.  


I actually bought a pre-made wooden decor piece from Hobby Lobby  from the Valentine's Day collection, that was perfect to alter. Red and totally glitter coated, not quite the look I was striving to achieve but perfect for sanding and painting.  

The dimensions of this wood sign are: Length: 7/8",  Width: 12 1/2,  "Height: 3 7/8".

stocking count


The Process - Steps of  DIY Altering


When transforming something into a shaker, you need a few essentials; 
1. Shaker Mix - amazing shaker mix makes a difference. This decor piece has buttons, sequins and beads from 28 Lilac Lane - Embellishment Kit - Love Story .

2.  Acrylic to create the shaker window.
3.  Chipboard to hide the acrylic edges.  My chipboard is from Creative Embellishments -Doily Frame Set 2.


Shaker Mix
I selected shaker mix that was both beautiful and bold to make the shaker element stand out.  This is 28 Lilac Lane - Embellishment Kit - Love Story .  All the coordinated embellishments in one box.  I did add a bit of gold cording, lace and florals as well. 
Patriotic Slider Pop-up Card
The Acrylic Window
I'm not really fussy about the acrylic I use however I do like free acrylic. I save clean clear acrylic from packaging whenever available.  For a decor piece that people will touch, pick up, and one that will last for years to come, I make sure to use thick acrylic for durability.  Steer clear away from flimsy film type acrylic.  

So go out and buy a package of something fun to snack on and use the acrylic for something crafty.  That's my best advice. 

TIPS for Glue : Use a good glue to secure the acrylic in place and hold.  I am not a fan of the hot glue gun and do not use one.   It's not durable and not reliable.  My favorite glue to use on any project and with any surface is 
Beacon Adhesives™ 3-In-1 Advanced Craft Glue - 4 Ounces.  This glue is great for wood, glass, plastic, metal, fabric, ceramic, leather, acrylic and just about anything your imagination can dream up.


beacons 3
-1 glue


 Chipboard Decorative Finish 
After the acrylic window is on the piece, filled and sealed, I use chipboard to hide the edges of the acrylic and make the piece look pretty and finished.  

Chipboard is inexpensive and easy to manipulate, paint, cut and shape to fit onto your piece.  The piece I used was from
 Creative Embellishments -Doily Frame Set 2.  I selected this for a few reasons.  I have both sides of the "O" to finish and hide the edges.  I cut out a few of the scallops to make it fit.  

stocking count


Thanks for stopping here today.  Happy crafting. 


Shop Here

*********************************************************************************

Buttons Galore Logo
stocking count


*********************************************************************************
beacons 3
-1 glue
Beacon Adhesives™ 3-In-1 Advanced Craft Glue - 4 Ounces


********************************************************************

Thursday, January 5, 2017

DIY Home Decor Wooden Purse - Petaloo

Refreshing and updating that old knick-knack 

I had a cute wooden purse knick-knack that I bought at a thrift store.  It was cute 10 years ago in a little girl's room but definitely needs some updated love and attention... and some Petaloo flowers to bring it back to life.  I say, "Let's give tired purse a second chance at love".  If you scroll down through this post, you'll find some helpful DIY tips as well to help make your projects 
durable.

Now here's my big secret in refreshing and repurposing items.  If at all possible, I try to salvage what I can and do as little painting as possible.  My expertise is in decorating - not painting.  I know painting can take a lot of time, effort and finesse.  I do not have an abundance of any of those.   So my philosophy is to work with what I have when possible - meaning no painting.  
The Graphic 45 "Place in Time" collection had perfect papers and colors for this project and worked well with the purple and green in the purse.  A project doesn't get much easier for me if I can leave the original paint alone.  


Making your home decor durable  

Another important aspect of home decor items is durability.  When making home decor pieces, I always think about pieces being handled, touched, dusted, moved.  Unfinished and untreated paper can become stained, get fragile, warp and the edges can rip.  You can add durability to your home decor paper pieces by coating it with a clear matte finish.   

I chose Mod Podge because that's what I had available, but you can make your own inexpensive finish by mixing white school glue and a bit of water and painting onto the project.  You can also use a clear, matte gel medium.  
The key to using these mediums as sealants and protective coatings is to make sure your edges are completely coated and adhered. 

I do not use glue on the paper.  I used the Mod Podge as glue.  To do this, I make sure to add the Mod Podge to both the wood and the backside of the paper.  Once the paper is down, it's important to  smooth out all air bubbles with your fingers, brayer or such like that.  Once satisfied, add a final layer of Mod Podge over the paper paying special attention to the edges making sure they are all secure.  
Before adding my gorgeous Petaloo embellishments, I wanted to add lace to the project but I realized the paper is busy.  In order to make my lace pop and give it some definition, I added a layer of paper behind it.  This prevents the delicate lace from getting lost in the busy patterns and embellishments.  


Here are some more close ups of the Petaloo flowers and  finished project along with the backside of the purse.  Here is a list of the Petaloo flowers that I added as perfect accents:

Thanks for stopping by. 

Petaloo Products:
Petaloo Darjeeling Flowers - Anenome Purple 1490104
Petaloo Darjeeling Flowers - Purple Petites 1465104R
Petaloo Darjeeling Flowers - Teastained Mini Butterflies 1486104
Petaloo Darjeeling Flowers - Mini Green Rosettes 1492107

Other Products:
Graphic 45  - Place in Time Deluxe Collectors Edition 4501470 (March Cut-Aparts)
Graphic 45  - Place in Time  Chipboard
Creative Charms - Vintage Brads VP-8210 Purple
ModPodge Matte
Green crystal flourish
Lace

Friday, November 6, 2015

Holiday Home Decor - Wooden Moose


Holiday Home Decor - Wooden Moose

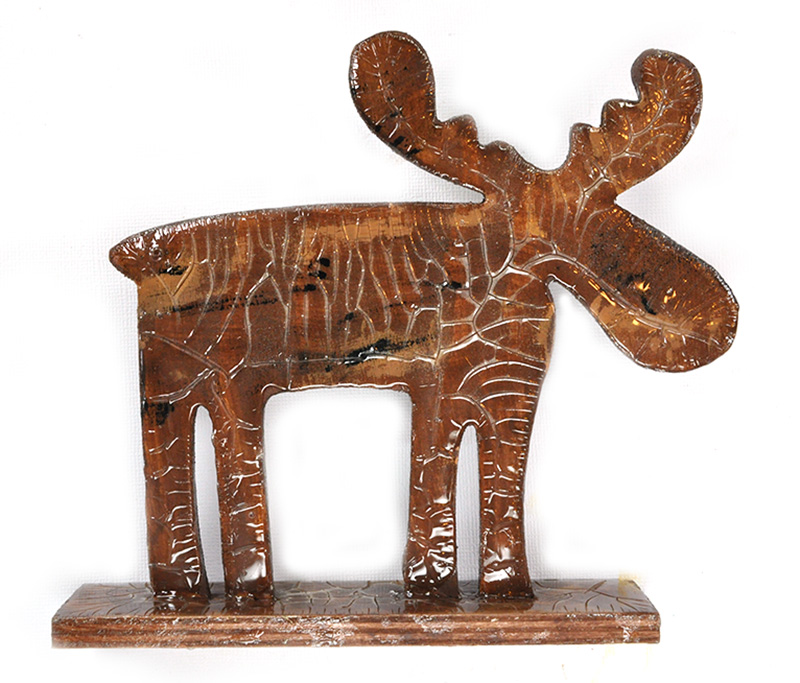
Here is a sweet piece of home decor that I made.  It's got a fun rustic crackle finish and  a woodsy outdoor feel. 

You can find all the easy step-by-step also right here at Blitsy.

Create an adorable rustic wood moose for the holiday season. This is great to give as a gift or keep for yourself and it adds that rustic homey feel to your holiday decor.

Products Used:

Darice Unfinished Wood Table Top Moose Antlers - 6.3" x 1.57" x 6.3"
Tim Holtz Distress Paint - Vintage Photo
Tim Holtz Distress Paint - Walnut Stain
Tim Holtz Distress Paint - Black Soot or Hickory Smoke
Tim Holtz Alterations Tattered Pinecones
Martha Stewart Pine Branch Punch
Foam Brushes
Raffia
Crackle Paste
Sequins
Green Mist
Burlap
Beacons Glue - 3-in-1
Prima Flowers Poinsettia Kiss
Green and Brown Cardstock
Hemp twine

Here are some close ups of the finished moose


Here's How To Make This

1.
Start with the adorable Darice Unfinished Wood Moose. This is a sweet table top Moose with a base that stands securely at 6.3" x 1.57" x 6.3". ADORABLE!
I painted it with a few different colored paints, base layer being dark or chocolate brown. For the base layer, I used a foam brush to cover all the nooks and edges. This was important since I didn't want a naked moose.


2.
Once the base layer was painted, I added some accent colors - black and a lighter brown. I used Tim Holtz Distress Paints in Black Soot and Vintage Photo. Make sure your paint layers are dry if you want to use the dauber that comes on top of the Distress Paints.
Is it necessary to add accent colors on the moose? No. Absolutely not. BUT as you scroll down to the next step, you'll see more clearly why I chose to add the accent colors. They really make my moose pop and "come to life", especially when crackle medium is added.

3.
Once all paint is dry, it's time to add a cool rustic twist to the moose. I did this using clear crackle medium/Crackle Paste. This is the coolest stuff for creating rustic looks and interesting texture to projects. I used clear Crackle Paste. It has a gorgeous glossy crackle finish when totally dry and makes the colors on the moose blend in nicely with the crackle finish.
The crackling doesn't happen immediately. It really needs to dry in order for the crackles to start appearing. You also need a bit of patience.
The key to using a crackle medium is to add a thick layer to your project and then let dry. You may need to let dry overnight. That's what I did. In fact I had to let this project dry over the course of a few evenings because I applied crackle paste to both sides of the moose as well as the base. That meant a lot of flipping over and letting dry - flipping back over and letting a different side dry. I painted the moose body first then moved to the base.
Ahhhhh but just look at the results!

4.
Embellishment Time!
I grabbed out some dies that would add more rustic appeal to my project. The Tim Holtz Tim Holtz Alterations Tattered Pinecones 657492 is perfect. Once I punched out my shapes, I enhanced them with Distress Ink in Vintage Photo and Walnut Stain. This little subtle step of inking the edges may be a small step but adds such a wonderful big impact to the overall finished look of a project.
5.
Here's how my Tattered Pinecones look after they have been rolled. I punched out some additional smaller pine branches using Martha Stewart's Pine punch. I love this punch - one of my favorite punches in fact. I'm going to layer the smaller pine branches right over the larger ones for a nice effect.
6.
I wanted to create a wreath-like effect around his neck so I wrapped some hemp twine around his neck and topped it with some red floral berries and red sequins. I also tucked some punched pine branches into the cluster. I wanted to bring some green up to the top of my project because there is so much green at the base. This is a technique that helps provide balance to a project .

Now for the finishing touches at the base.
I glued a layer of burlap to the base, added my Tattered Pinecones and started creating the cluster outward from there. This included adding bits of red floral berries and sequins, punched pine branches and a tiny bit of raffia.
 

 Thanks so much for stopping here.  I appreciate you.