Showing posts with label tutorials. Show all posts

Monday, February 15, 2016

Fun and Fabulous Heart Card DIY's


I'm here to celebrate Valentine's Day the Flying Unicorn way...with three DIY cards featuring hearts.  As we all know, hearts may be the symbol of Valentine's Day but  hearts are always perfect to use year round.  
Washi Tape Heart Card
This card is bright cheery and happy...and flat for those who really want to stick with flat, easy to mail cards.   This is a washi tape card.   The Flying Unicorn store has a variety of washi tape including gorgeous ginghams,  chevrons, delicate flowers and trendy stripes. 

Supplies:
Julie Nutting Stamp Set : Lots of Love 910488
Heart Punch or Die ( I used Spellbinders D-Lites Vines of Passion)
PreFolded card - 5.5x3.75
Washi Tape  - Flying Unicorns LimeC Checkers washi tape
Washi Tape - Flying Unicorns Pink Meadow
Washi Tape - Flying Unicorns Hot Pink Checkers


Instructions:
This design is meant to be used on a card sized 5.5in x3.75in

Step 1.  Cut a boarder from pink cardstock approx 1/4in smaller than the card.  Glue to card as a mat.
Step 2.  Cut a smaller white rectangle and punch or cut a heart shape  slightly off center.  Leave enough room for a sentiment.
Step 3. Place the rectangle from step 2 down onto the card and trace the heart shape with pencil.  When you remove the white rectangle, you will see the pencil outline from the heart.  This will show you exactly where to place your washi tape strips.  I covered the heart with strips of washi tape: LimeC checkersPink Meadow, and Hot Pink Checkers.


Step 4. Glue the top piece in place. 
 Step 5. Stamp your sentiment.  The sentiment is from Julie Nutting Stamp Set : Lots of Love.  These sets are great to use on everyday cards. the punched heart rectangle onto the card.  See how pretty this looks?

Here is a great card set that can be used as a sentiment for the card.  Here is another one, "Sending you warm wishes", how perfect.


Step 6.  As one final step, I used a very fine tip marker and added some faux stitching around the heart and then topped the card with a sweet little ribbon.


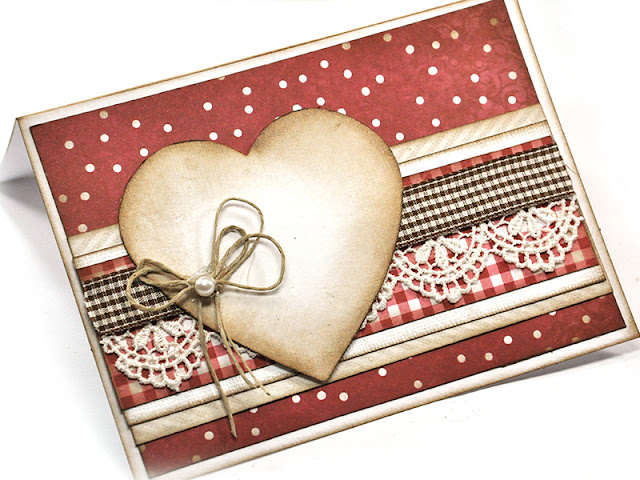
This is my second card.  It was made with wonderful Lemoncraft Christmas Wishes collection.  Yes, this is a Christmas collection but you would never know it.  It's a totally versatile collection.  

Supplies:
Lemoncraft Christmas Wishes collection
Tim Holtz Walnut Stain Distress Ink
PreFolded card - 5.5x3.75
Lace Trim ( from my stash) but these are great choices and this
String ,  this wax cord  and this cord is great
Gingham Ribbon from my stash
Pearl bead


Instructions:
This design is meant to be used on a card sized 5.5in x3.75in

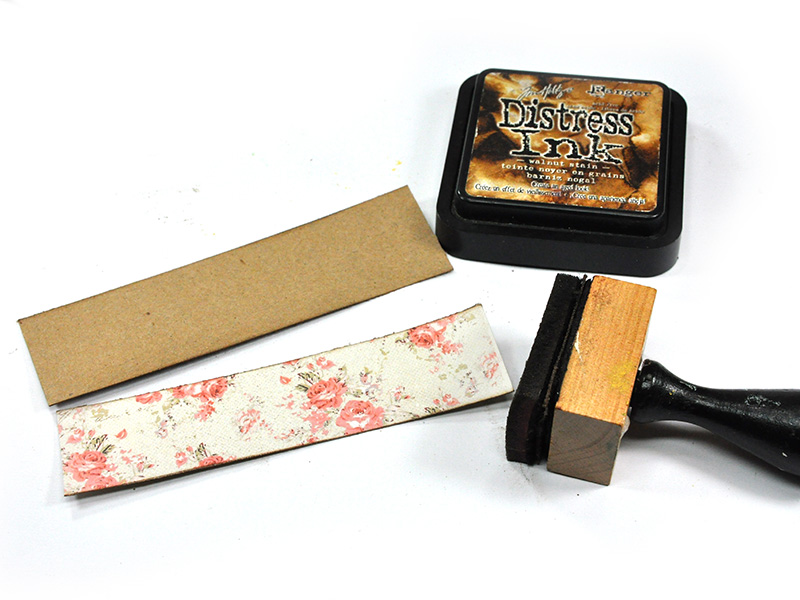
Step 1.  Cut layers, heart and strips of patterned paper.  Ink all the edges.

Step 2.  Assemble 
Step 3.  Add lace and ribbon.

Step 4.  Top with the heart, cord and a pearl.
This is the third card.  This features the Maja Design  "Summer Crush" collection.  

Hearts Card Featuring Maja Design Summer Crush

Supplies:
Maja Design Summer Crush collection is here
Maja Design Summer Crush - "He Gives Her Flowers" paper SUM-757
Maja Design Summer Crush - "Snapshots" paper SUM-767
Kraft cardstock
Kraft prefolded card
Cut or punched hearts
Pearl bead
Hemp
Tim Holtz Walnut Stain Distress Ink


Step 1.  Cut layers and Ink edges including the kraft pre-folded card.  5.5in x 3.75in


Step 2.  Cut some strips to be layered as well.  I cut one larger strip from kraft paper and one smaller strip to be layered from the Summer Crush paper.  Ink. Assemble the card.


Step 3.  Cut your hearts out and ink the edges with Walnut Stain.  You'll have two large hearts and 1 small heart.


Step 4.  Glue the large hearts to the card. Add foam tape, pop dots or cardboard to the small heart for dimension.  Glue to card.


Step 7.  Tuck in a little trim ( I used brown gingham) and a hemp string bow.  Add a few embellishing pearls.


Thanks for stopping here today. 

Visit our NEW Store!
Are you visiting the Tallahassee area soon?
Stop in and say hello!
Plan a day trip! Crops -Classes-Fun

926 North Monroe St
Tallahassee, Florida
Tel: 850.270.6366 Toll Free 800.231.7119

Saturday, January 30, 2016

DIY Quick and Easy Valentines Cards - So Simple


Create some quick and easy Valentines day cards

I used Simple Stories "You & Me " Collection to whip up the sweetest and easiest cards. Simple Stories helps make it easy with their journal cards.  The key to these cards lies in layering papers.  


Here are the simple instructions


The Simple Stories "You & Me" collection was meant to be layered and to mix up the fun patterns. In addition, this collection has a wonderful fun array of journal cards ands ATC's for pocket pages, cards, fast scrapbook pages and journaling.  
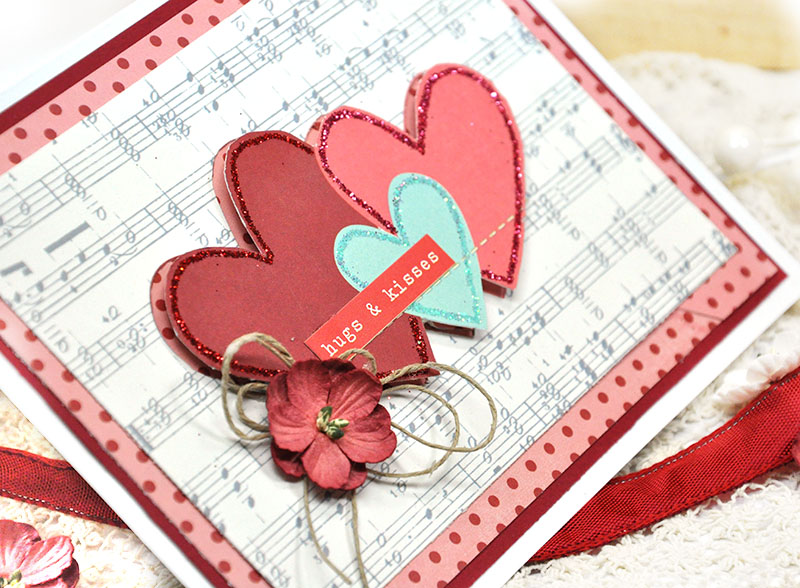
I cut the heart images from this 4x6 journal card.  Set the hearts aside.  These are going to be embellished and given some dimension with foam tape.
I grabbed a glue pen and some glitter to give these hearts a touch of glitz and glam.  The glue pen is easy to use and perfect for making thin lines. 


Drizzle the glitter over the wet glue pen lines and you're all set!  BAM, instant bedazzling.  I like to use a bead funnel as a glitter funnel - makes clean up a  snap. 

Embellishment time! Simple Stories has awesome stickers included in each collection.  I aded a sticker from the Simple Stories, "You & Me" collection, a small flower and a hemp twine bow.
I wanted the hearts to have some dimension so I backed them with  foam tape to make them pop.  
Fun, right?  And Easy too. 


This card is equally easy and primarily consists of a few layers. In addition to white cardstock, I selected a journal card from Simple Stories, "You & Me" collection, and some patterned paper from the collection to use as a mat.


I added some texture using  an embossing folder - this is the Tim Holtz Music folder. 

I tied some hemp string around the card. Then I added foam tape to the back for a raised layer.


Simple and yet lovely. 


In this card,. I used some kraft and red cardstock as matting for the card topped with a 3" x 4" ATC from Simple Stories, "You & Me" collection.
 The ATC has a fun image of a key tied with twine. I wanted to make that "come to life" so I wrapped the ATC in hemp twine and tied the key sticker from the collection to the card.


I wanted to make the heart pop a bit so I pulled out the Inkessentials Glossy Accents. This is easy to use. Just apply evenly to the surface of the heart and let air dry. As the Glossy Accents are drying, you can add sequins, micro beads, glitter and other embellishments as you like. The Glossy Accents act like glue and will hold all those embellishments perfectly. 

 Once the Glossy Accents were completely dry, I highlighted the white polkadots on the heart with a white Sharpie paint pen.

 Here is the completed card with close ups:


Product List

Tape
Kraft Cardstock
Red Cardstock
Stickles Christmas Red
Stickles  Diamond
Glitter Set
Anti Static Pad
Sizzix Alterations Texture Fades - Postcards & Music Sheet
Hemp Cord
Craft Knife
Quickie Glue Pen
Foam Tape
Micro beads - Gold
Petaloo Flowers - Forgetmenots 0 Antique Red
Inkessentials Glossy Accents
Simple Stories - You & Me 12x12 Simple Set
Simple Stories - You & Me 6x12 Stickers 
Petaloo Forgetmenots - Antique Red
Prefolded cards/envelopes
White cardstock - for card 
Sequins 
Bead Funnel - 4.75" x3"