Showing posts with label Mixed Art. Show all posts

Wednesday, September 30, 2015

Spooky Skeleton Canvas For Halloween


This is my spooky Halloween skeleton canvas.  I created it with the Flying Unicorns Oct Mixed Art kit. 


http://www.flyingunicornstore.com

From the beginner to the avid mixed media artist our Mixed Art add on kit will surely please you. Our Mixed Art kit will always come with a canvas and mixed media art supplies to advance your skills as an artist.
**********

When I am making a canvas with dimensional pieces that are fragile, I try my best to secure those  pieces.  For example in this canvas, my skeletons need to be tied on to the canvas some how and not just glued.  I can't rely on glue.  And I never use hot glue for these types of projects.  Hot glue will be great for one season.  Then next year you'll go to pull the spooky canvas back out and your skeletons will be no where in sight.  Zombies you say? pfffft.  If only!  No, they are sitting at the bottom of the storage box, or fell off and landed on some other seasonal decoration.  No worries because you'll probably find them hanging off a Christmas wreath.   The hot glue just isn't durable.   

****************


So How did I Make My Canvas?

So this is what I did with my canvas.  I flipped it over and used the reverse side as a sort of shadow box. 

Step 1.  I painted it black.  I used Prima's Chalkboard paint in black because I did not want a shiny gloss finish and I really love the coverage this paint has when I use it. Any black acrylic will do or even black gesso. 

Step 2.  I added some blue acrylic paint to the canvas for blue highlights. 

Step 3.  The kit comes with some wonderful crackle paint so I loaded one side at a time and let it dry overnight.  I ended up pouring the DecoArt Crackle Medium onto my canvas instead of painting it on.  The medium is self leveling meaning there is really no need to spread it to even it out.  I used a palette knife to move it around on the canvas but just let it even out on it's own.  I also used it quite thickly.  A thick covering provides the best crackle effect. 

I needed to do this step over the course of a few days because I also did all the edges.  I'd apply the crackle to an edge and then let it dry overnight before I could apply the crackle to a different edge. 

What I am really trying to say is that you can't use the crackle medium if you are in a hurry to finish a project.  You wont get the results you want and you'll be unhappy and frustrated.  
  (Continue scrolling for the rest of the steps)

Step 4. After totally dry,  I grabbed the jar of Texturz - Mari-Gold Digger that came in the kit and rubbed it into the cracks on the canvas - just here and there, not all over the entire canvas. 

Step 5. I wanted some accents in purple and gold so I grabbed 13Arts Acrylic Paint  in Old Gold and Vivid Violet and rubbed those into some cracks as well. Why 13Arts paints?  Great question.  This paint has a nice shimmery quality and a sort of iridescence.  I thought it would really pop against the black crackle and it did.  I was quite pleased. 

You can really see the effect in the photo below.  It adds a cool texture to the canvas with little pops of color. 


Step 6.  I wanted to prepare for a banner so I used hemp and stapled the hemp cord to the canvas.  One end of the hemp was stapled to the front of the canvas ( with a lot of string left dangling to be used later to attach my skeleton) and the left end of the hemp was stapled to the back of the canvas.  I added my Graphic45 Banner  - Rare Oddities collection -after the hemp was securely in place.  This way I could control how the banner pieces rested instead of fighting with them as I was installing the banner.  That's just a royal pain.  I also decorated the banner at this point.

Step 7. I used the long dangling end piece in step 6 to tie the top skeleton to thew canvas.  He is never ever going to stay up there no matter how much glue you add - just not happenin.  So be creative with staples and twine /hemp /string.  The is the only way you will make this more durable and the easiest way in my opinion. 

If you look closely to the skeleton's leg, you'll see it's wrapped in hemp.  From there, I snaked the hemp through the torso of the skeleton and stapled the hemp to the top of the canvas right behind him near his buttocks. You can't even tell from the photo.  That's how nicely this technique is- it's so inconspicuous.   OK honestly, I added the staple FIRST before the skeleton was set in place and pried the staple up a little so I could thread the string through it.  Then I sat the skeleton on top and tied it down tightly.  That is the easier way.  No fighting with the skeleton if you add the staple first.  

You'll need to have a pliers or knife handy to pry the staple up a bit. 

Then to finally secure in place, I wrapped the string around the skeletons right arm and stapled the twine in the back of the canvas.  He's on there for life...not his life, but mine.  

( keep scrolling)
Step 8.  I also needed to tie these two little hooligans onto my canvas as well to secure them forever.  I made a few staples here and there in all the places I mapped out.  I pried up the staple with my pliers and threaded the hemp through the staples and then through the skeletons.  They are tied together forever so I hope they get along.  


Step 9. I decorated the banner pieces after they were placed on the banner and added creepy cheesecloth to cover up the staples and continued to decorate my canvas till completion.  


so do not delay in getting yours!


Visit our NEW Store!
Plan a day trip! Crops -Classes-Fun
926 North Monroe St   
Tallahassee, Florida
Tel: 850.270.6366 Toll Free 800.231.7119

Contents of the Mixed Art Kit: 6x12 Canvas, Watercolor Paint Set x12, Prima Stencil 582883, Deco Art Crackle,13@rts chalk sap green, Texturez Marigold Digger, 13@rts old gold , 13@rts silver beads, Inklingz Miner Miner, Black Gesso 13@rts.


Products Used:
Flying Unicorn Mixed Art Kit - Oct
Darice - Squangles canvas - 5.5in x 12 in
Texturz - Mari-Gold Digger
13Arts Ayeda Acrylic Paint - Old Gold, Violet
Prima Black Chalkboard Paint
Tim Holtz Corked Vials TH92899
Graphic 45 Rare Oddities Collection -
Prima Soprano Purple Flowers 561697
Prima Soprano Orange Flowers 559113
DoveCraft - Bohemian Gems DCDOT003
DecoArt Media Crackle Glaze
Floral Berries
Cheesecloth
Hemp cord

Thank for stopping by!!!

Tuesday, September 8, 2015

Mixed Art Photo Album from Tim Holtz


Mixed Art  Photo Album from Tim Holtz

Each month the Flying Unicorns has a special mini called Mixed Art.  
I created a simple mixed art photo album from the Flying Unicorns kit for September which features the Journal Book from Tim Holtz. 

I kept mine simple because I an really new to the mixed journals.  I like it but it's not a skill set of mine. But I guess it doesn't need to fancy or intricate as long as you are enjoying the process. 

This month's kit includes:
 Two sheets Nature’s Garden by Papermania, Tim Holtz Journal Book, Tim Holtz Binder Rings with Brads, Ideaology 6 pocket sleeves, Hot off the press pretty bird stamp , 1 sheet watercolor paper, Watercolor compact paint set, Shimmerz Tickle Me Turquoise, Shimmeringz.
My process was quite easy.  I used the Shimmerz Tickle Me Turquoise all over the book to add and enrich the blue turquoise.  Then I added a white wash of gesso ( very watered down).  I also added a few squirts of the Shimmerings which added just a blush of golden yellow. After that, it's embellishment time. 
The flower is Prima , with a Flying Unicorn metal adornment behind it and a layer of cheesecloth. 


Thanks for stopping by.  You can grab your Flying Unicorn journal book kit here


Thursday, April 30, 2015

May Canvas - Flying Unicorns Mixed Art Kit


Flying Unicorns Mixed Art Kit for May
http://www.flyingunicornstore.com


From the beginner to the avid mixed media artist our Mixed Art add on kit will surely please you. Our Mixed Art kit will always come with a canvas and mixed media art supplies to advance your skills as an artist.

This month's kit comes with a canvas , some Ayeeda art products  and fun embellishments.  Use as much or as little as you want from the kit.   The Ayeeda paints and micas are easy to use and apply so smoothly. 

This canvas was super super easy.  I used the sponge to apply the Ayeeda black paint from the kit, then accent with the Gold Ayeeda paint.    Next I painted the filmstrip chipboard and glued it to the canvas. 
I dabbed some gle medium here and there and accented with beads. That's about it. 

http://www.flyingunicornstore.com/category_s/1522.htm

My sentiment says" Surely happiness is reflective like the light of heaven".  I thought it appropriate for the photos of a beach vacation with my husband.  Of all our vacations,  we seem to enjoy the beach the most.   It is a magical and special place for us.  


 Mixed Art ...get your kit here.


Monday, March 31, 2014

Flying Unicorns Mixed Art for April - Relax wall canvas


Mixed Art add on kit is for beginners and enthusiasts who love mixed media and creating journal pages, layouts, with lots of textures and details! Our Mixed Art kit always come with a canvas to allow your to create works of art that can be displayed in your home. gifted or to practice your techniques. Its about finding the passion in you and creating! The colors of the Mixed Art compliment the main kit and other add ons allowing you additional items and mediums to play with.

I am obsessed with the beach theme lately as winter lingers on and on here.  Yesterday we had yet another 7 inches of snow.  STOP I say. 

So I need to surround myself with the peaceful tranquility of the ocean.  I grabbed the FabScraps Beachcomber collection for this. 

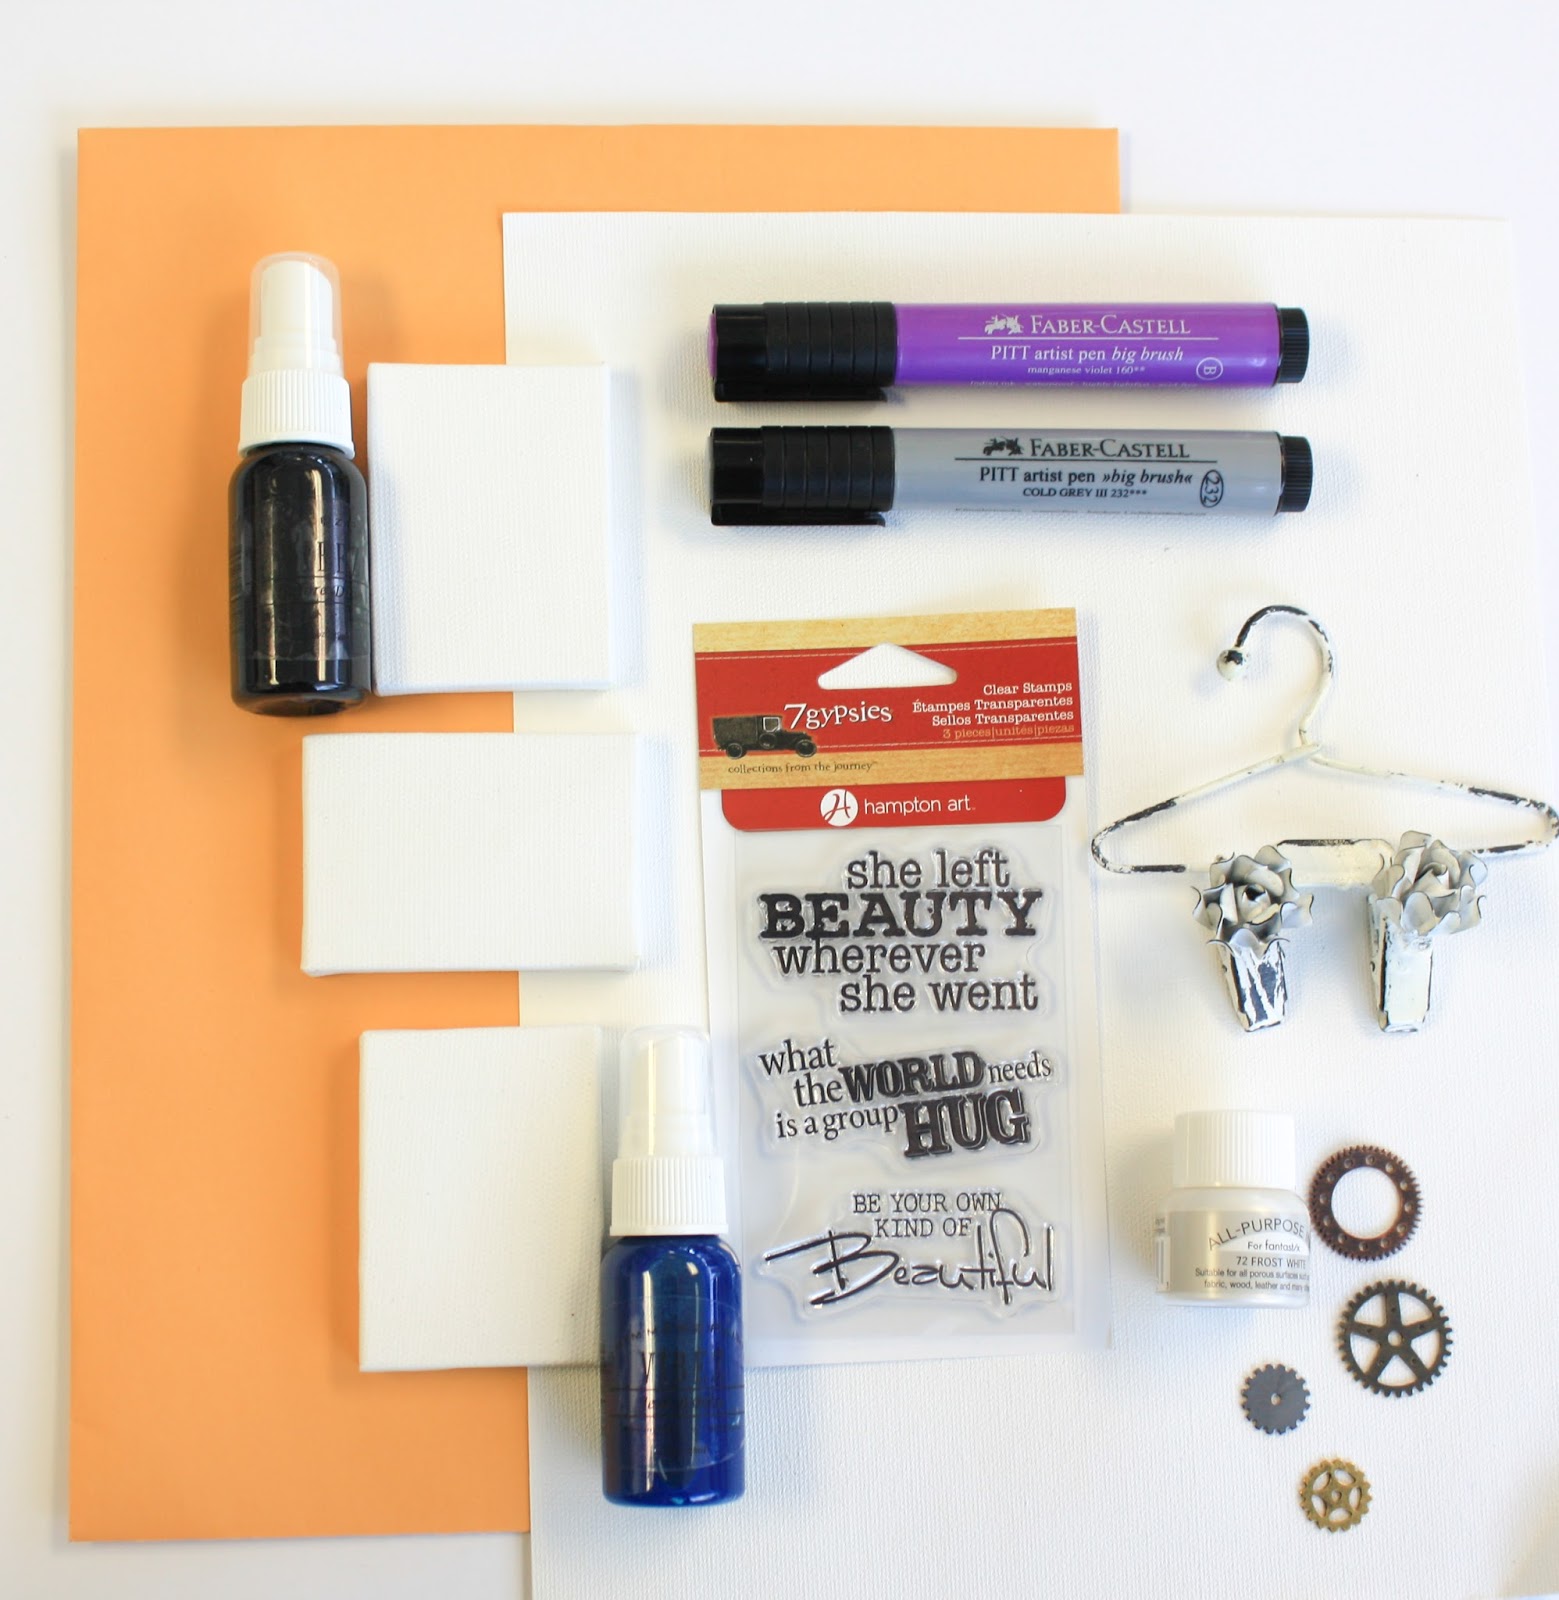
This project has two looks - one with the 8in x 8in canvas behind it and one without.  Just pop off the pretty decorative hanger and it hangs alone on a wall or window. 

 Below is the tiny mini frame decorated with elements from the Mixed Art add-on and from FabScraps Beachcomber collection.  You can see shots of it on the background and off. 

I have also attached step by step instructions of the project at the bottom of this post. 


The metal gears  have been covered in white frosty ink and heat dried.


The gorgeous sanddollar chipboard piece from FabScraps DC64013 has been painted white, and covered in Shimmerz Texturez, Tidy Widy.  This is wonderful texture paste. 

The star fish is also from FabScraps chipboard DC64013 and has been painted white and covered in Tidy Widy texture paste.   I have also added strips of mesh,  Viva Sand Texture paste, dry wall tape,  and fibers. 


Here is the complete project without the 8x8 canvas background. 

Grab up the  Mixed Art kit  before it's gone.  


For This Project You Will Need


Instructions
1.     Background Canvas Preparation:
2.     Cut a square of FabScraps Beachcomber Splashes 2 C64004 paper to cover the front of your canvas – leave ¼ in around the edges for canvas to show.  Glue to canvas – or adhere using a gel medium.  Gel medium  will not ripple the paper.
3.     Dab gesso or thin white acrylic paint around edges of paper and canvas for a beachy weathered effect.
4.     Drill a hole in the top of the canvas at the wood frame and attach the decorative door knob. Make sure decorative metal hanger fits over door knob.
5.     Chipboard Preparation:
6.      FabScraps Beachcomber Collection chipboard – Shells and Starfish DC64013 - Paint a sand dollar and a star fish with white gesso or paint.  Cover with a texture medium like molding paste or ceramic paste.  You can even mix sand to your molding paste to create beachy texture.
7.     Add a decorative center to the starfish.  Set aside.
8.     Glue Sand dollar to the metal hangar.  Add some web weave on the back and a fiber bow.
9.     Decorate the bow with punched paper tape and pearls or beads.  
10.   Mini Canvas Preparation:
11.   To decorate the mini  canvas – here are the products I used but the options are limitless.
12.   Small canvas #1 – I used layers of molding paste, sand  texture, mesh, fibers, punched paper tape that had been inked.  I glued the chipboard starfish to the canvas, then tied  fiber around it to further hold in place.  Add trim to the bottom – I used Web weave.
13.   Small Canvas #2misted lightly and let drip. When dry, added some small metal gear charms that had been heat embossed with white.  Added some punched tape.  Inked the edges lightly,
14.   Using stickers from FabScraps Beachcomber Collection Stickers ST64001, remove the “Relax” sticker and mount on white cardstock to make it durable and brighter since the stickers are transparent.   Glue to the canvas.
15.   Add small amount of fishing net to the back and dab the net with gesso for a softer weathered look. Finish with web weave glued to the bottom of the canvas.
16.   Finishing Touches:
17.   Glue some ribbon to the mini canvas’ and clip to the hanger to let hang.

18.    Using stickers from FabScraps Beachcomber Collection Stickers ST64001, remove the banner  stickers and mount on white cardstock to make it durable and brighter since the stickers are transparent.   Glue to the top of the canvas. 


Saturday, March 1, 2014

Flying Unicorns Mar - MixedArt Kit Ocean Side Canvas featuring FabScraps Chipboard


Flying Unicorn has released it's March Kit of the Month

Welcome to the Mixed Art! Our new add on kit will always come with a canvas and a variety mediums, mists, tools that compliment that main kit.

This was created using the Mixed Media add-on kit for the month of March for the Flying Unicorns. It came with a  9x12 canvas, Loew/Cornell Simply Art Watercolor paint - which I have never used but was excited to dive in and give it a whirl.


Oh where to start with this project.  It was fun.  It was messy.  It was painty and inky.  I used a lot of paper towels on this piece.  I also want to mention that the  magnificent lighthouse and the chipboard words are from FabScraps -their new Beachcomber collection.   

So How did I do this?  Part 1 - The background
Step 1. I first coated the canvas with blue water color paint.  Then used a paper towel  to dab some off in places.
Step 2.   I sprayed 13Arts Ayeeda mists in Navy and Turquoise around the page and dabbed off in places with my paper towel.
Step 3.  I misted 13Arts Ayeeda yellow on the page in places.     Hmmmm Of course you knew that blue and yellow make green....but I've gotta tell ya, that was totally unexpected on this canvas.  Ohhhhhh NOoooo I didnt want green.  So I misted the whole thing with water to lighten up.  I dabbed dry with a paper towel to remove excess paint and mist ...and green.  The beauty of watercolor paints and mists - a little spritz of water and all is right again.

back to the beginning.
Step 6. add more blue water color paint.  Then used a paper towel  to dab some off in places.
Step 7.  add more  13Arts Ayeeda mists in Navy and Turquoise around the page and dabbed off in places with my paper towel.
Step 8.   Add 13Arts Ayeeda yellow only on the edges of the canvas.


So How did I do this?  Part 2 - The Sea and Land from Paper Towels
Once I got to background finished, I had the most gorgeous paper towels ever.  Ohhh they were gorgeous with the blues and the hints of Yellow mist mixed to make some green.  I couldn't part with them so I decided to use them on the bottom of the page as water and landscape.

Step 1. I bunched up the paper towel and blasted quickly with my heat gun to dry and stiffen it.
Step 2.   I painted gloss gel medium along the bottom of the canvas quite generously so that my paper towel would stick to it.  Then I ripped strips of toweling and bunched them onto the canvas.  I folded the excess paper towel around the canvas bottom edge and sides.
Step 3.  I gently covered the top of the paper towel with more gel medium - dabbing so as not to flatten the paper towel.  
Step 4.I used a paint brush and added more mist and paint to the land and sea where it needed more drama.
Step 5. I sprayed a matte varnish to the top of my paper towel land and sea.  When you touch it. it is stiff and does not look like toweling.
Step 6. Added some Stickles in Platinum very very thinly here and there in the sea and the land.


So How did I do this?  Part 3 - The FabScraps Chipboard Words
This fabulous chipboard piece is indeed fabulous...FabScraps fabulous. From the new Beachcomber collection.

Step 1. I painted with gesso.
Step 2.   I  ran a foam brush dipped in sand colored paint along the top of the chipboard.  Then I wiped off with paper towel just to soften and make look more weathered.
Step 3.  I ran a little blue water color paint over the chipboard and wiped off.  
Step 4. I gently inked the chipboard with Tim Holtz Pumice and Tea dye distress ink.
Step 5. I topped with Stickles in Platinum and rubbed the stickles on the chipboard with my finger to spread around and make sparkle - though the photo doesn't really show the stickles.  Pity really.  hehehe

The additional texture on my canvas was created  using Flying Unicorns white mesh
( the little squares), a new Prima Mask, and small pieces of everyday cheesecloth. 
The white mesh is fun and adds just s hint of texture without overpowering your art piece and 
becoming the focal point. 


Grab the Mixed Art!  - the new add on kit to the March kit of the month.   

Instructions
1.     Background Canvas Preparation:
2.     Paint 6x12 canvas with blue watercolor paint.  Dampen a paper towel and blot off in places. 
3.     Spray turquoise mist and blot off again with paper towel.  Repeat with yellow mist, and navy mist.   If the colors appear to dark for you, spray with water and blot off – repeat  as often as necessary.
4.     Sea, sky and Landscape Preparation:
5.     Your  paper towel from the background preparation should be nicely covered in ink.  Scrunch the paper towel and blast with heat gun to dry out and stiffen.
6.     Decide where your sea and land will be on the canvas and coat that section generously with gel medium.  Rip pieces of paper towel and stick to the gel medium creating the sea and land.
7.     If you want to add more color to the land and sea, then add more ink to a paint brush and paint directly on to the paper towel.
8.     When your colors are satisfactory,  gently dab gel medium over the top of the paper towel to harden. When dry, coat with a matte sealant or protective spray. 
9.     For the sky, you can create cloud-like effects several ways.  I used a stencil with small dots and applied molding paste for cloud effects.  You can also use a stamp dabbed in gesso.  You can use a sponge dabbed in gesso.  You can paint bubble wrap and dab onto the canvas. 
10.   Add mesh as desired to the page and  add a little gesso or molding paste over it – gently with only a dab
11.   Chipboard Preparation
12.   Cover the FabScraps Beachcomber Light house chipboard DC64015 with FabScraps Beachcomber Collection Jounal Die cuts MC64001A.
13.   Glue lighthouse to canvas.
14.   Cover FabScraps Beachcomber collection – Relax and Unwind Chipboard  DC64006 with gessot. 
15.   Dab some sand  or tan colored acrylic paint on the chipboard words here and there.  Wipe off.
16.   Do the same with the navy or turquoise paint by dabbing on and wiping off
17.   Rub pumice and tea colored ink on the edges of the chipboard
18.   Rub platinum glitter glue on the chipboard.  Glue to canvas.
19.   Finishing Embellishing Touches:

20.   Add shells, beads, trims, netting and embellishments as desired. 

Supplies:
Flying Unicorns Kit of the Month Mixed Art!
Loew/Cornell Simply Art Watercolor paint
FabScraps Beachcomber Collection -  Relax and Unwind Chipboard DC64 006
FabScraps Beachcomber Collection -  Light House Chipboard DC64 015
FabScraps Beachcomber Collection  -  Beachcomber Journal Pages MC64001A
13Arts Ayeeda Pearl Mist Navy Blue 
13Arts Ayeeda  Mist Turquoise Light
13Arts Ayeeda  Mist Chalk Yellow
13Arts Ayeeda Mist  -Chalk White
13Arts Ayeeda white gesso
Gloss Gel medium
gold flecked fibers
paper towels
Flying Unicorns white mesh
jewelry beads with an iridescent coating
Tim Holtz Distress Ink - Pumice - Tea Dye
Viva Stone Art - sand
Prima Mask 572242
Stickles Platinum 
Shells
cheesecloth