Friday, September 20, 2013

Prima - Frugal Friday with the Anna Marie Collection


Prima has started a fascinating weekly feature called Frugal Friday. These are projects that can be completed under $5.00 -technically $5.00 in Prima products to be clear. ( You can find the post on the Prima blog  here)

I have a fun project that can be used in so many different situations - get well gifts, teacher appreciation, candy container, goodies for the office, Christmas cookie exchanges, holiday fudge or peanut brittle, to say thank you, or just to say "I love you".

This all starts with a food tin and some pretty Prima papers and embellishments. Tins come in all sizes.  My tin is 12in diameter - rather large.  I am going to fill mine with chocolate chip cookies for a bake sale,  so I went big.  Because my tin was so large, I used more Prima product to embellish.  Your project can be scaled down to be even more frugal.

Now the choice of tins is important.  Feel the top and sides of the tin to make sure they are flat - no raised or stamped images on the tin or your beautiful Prima papers will not lie flat and you'll be having a big paper smackdown on them...you will not end up the winner of that battle.  (sad face).

Make your life easy - just make certain the tin is totally flat.  ahhhhhhh simple.

Best place to find an inexpensive tin?  yard sales/garage sales, thrift stores and keep your eye out for clearance sales after any holiday.  I bought my tin at an after Christmas clearance bin for 99cents.


Here are my simple steps:
Step 1.  I painted my tin with gesso to make the glue for the paper grip the tin better.  
Step 2.  Cover top and sides with beautiful Prima paper.  Important - you need to leave a little of the top edge of the tin uncovered.  The tin lid will not close if you add paper to the entire side.  In the photo below, you can see that I left about 1/4 inch of the side without paper.


Step 3.  Use the Ingvild Bolme Distressing tool on the edges of the paper to give them a finished appearance, to sand off extra paper, and round the edges.
Step 4.  Apply a Prima stencil to the top with molding paste.  It is fairly light in the photo but the texture when you are holding the lid and looking at it is a spectacular special touch. I used Elementals Stencil 960551.
Step 5.  Add some trim to the lid and to the sides.  I used whatever trim was in my stash.  I had some light colored burlap that I cut into a strip and glued to the side of the tin.  I topped with more lace trim.  I did not worry about neatly cutting the burlap - I think that is an impossible task if the edges start to fray.  Instead, I decided that uneven, jagged and frayed edges added to my shabby chic elegance of the gift.
Step 6. I had leftover burlap from the strip that I cut for Step 5.  I thought that a loose, un-fussy bow from the leftover burlap would be nice.  It would add interest to the top of the tin, add texture, be great filler with my floral cluster, save money by using less embellishments, and finally make the top and bottom of the tin a more harmonious and unified.


Step 7. Finish with flowers, lace, pearl strands, gems, feathers, tags.  Fill with just about anything and enjoy. 
You can make a tag from the leftover Prima paper if you are so inclined to save even more money. 


Total cost of Prima product for this project:  $5.81. Keep in mind that  I needed to use a lot of flowers since the tin was very large.  Your tin may be smaller, cutting down on the expense.

Total cost of Prima Product purchased: $19.74
Total cost of unused Prima Product waiting to be used on the next amazing project:  $13.93


Prima Supplies:
846336 Anna Marie Collection - Calico paper
846329 Anna Marie Collection - Sewing Basket paper (pink paper side)
563035 Anna Marie Collection - "Tag Me" Tickets and Tags
960551 Elementals Stencil
570675 Anna Marie Collection - Anna Marie C Flowers
561406 Prima Interlude Flowers in Yellow
571528 Prima Le Mia B Flowers
890940 Ingvild Bolme Distressing Tool

Other Supplies:
Feathers
Burlap
Molding paste
Trim
Pearl trim strands


Product Price List
QTY used            Description                                                                               Price per Item Used
1     sheet Anna Marie Calico paper (12x12)..........................................................................$.89
1     sheet Anna Marie Sewing Basket paper (12x12)............................................................ .$.89
1     Tag from  Anna Marie - "Tag Me" Tickets and Tags ($3.99/ 24 pieces= $.17 each)... ........$.17
5      Prima Interlude Flowers in Yellow -package of 12 ($4.99/ 12 = $.42 each)......................$2.10
3      Prima Le Mia B Flowers -package of 12  ($4.99/ 12 = $.42 each)..................................  $1.26
1      Anna Marie Collection - Anna Marie C Flowers package of 8  ($3.99 /8=$.50)............... $.50
                                                                            Keep in mind my tin was big          Total.......$5.81  


Thursday, September 19, 2013

FabScraps Angelic Christmas Collection - Flying Unicorns


I know it seems that Christmas is a distance away yet, but I am preparing early with FabScraps Angelic Christmas collection.    - now available in the Flying Unicorns store.  The collection takes a wonderful nontraditional approach with purples, greens, creams and an old world vintage appeal.

I had a vintage Santa image with an eggplant color thus I selected the purple background .

My grass was created as a sort of mistake.  I had punched a whole bunch of pine branches out with the McGill pine branch punch to use as a complement to the photo. Then I got to thinking that I really liked the frayed look of the punched paper.  So that's the direction my page took.


 I needed trees of course if Santa is surrounded by a pine forest.  I created them out of cardboard and there is a simple step-by -step down below.

I finished the layout with some Prima flowers and some rolled ones.


Visit FabScraps blog here and LIKE them on Facebook.  Thanks a bunch for stopping.  As I mentioned, you can purchase the paper collection from Flying Unicorns.


For This Project You Will Need
Instructions
1.     Background  Paper Preparation:
2.     Start with FabScraps  Angelic Christmas Collection – Bauble Delight paper  C61 001  – paint  white paint or gesso onto the center of the page using a foam brush, sea sponge or even blot with paper towel.  Make it look like a snowy winter day.
3.     Drip white paint or white mist onto the page to look like snowflakes falling.
4.     Cut a strip approx 3inx10in from FabScraps  Angelic Christmas -  Special Delight paper C61 003.  Using an evergreen pine branch punch, make several  punches along the bottom edge of the paper strip.
5.     Glue the paper strip horizontally to the purple Bauble Delight background sheet -  starting about 4 inches from the bottom.
6.     Glue two of the pine punches to under the paper strip.
7.     Ruffle up the edges of the paper strip to look like  grass.  Lightly paint some white paint or gesso on the paper strip here and there like a dusting of snow on the grass.
8.     Tree Preparation:
9.     Cut two triangles from cardboard.  One triangle sized 6in x 4in and the second 5in x 3.5 in. 
10.   Rip the right edge of the cardboard  so that the cardboard is jagged and part of the corrugation is showing. 
11.   Cover the trees with FabScraps Angelic Christmas collection – Special Times paper C61 003.  Leave the corrugated edge uncovered. 
12.   Coat the corrugated edge with embossing ink making  a little bit spill over onto the FabScraps Special Times green paper.   Cover with white antique embossing powder and shake off excess.
13.   Set with heat gun.
14.   Layer the trees with the large on the bottom and the smaller on top.  Glue to the right side of the page, on the paper strip.
15.    Coat the bottom of the trees with snow texture paste. Let dry completely.
16.   Image Preparation:
17.   Cut angel image from photo paper and add dimensional glue dots to the back to make this pop off the page. I use cardboard to back my photo to give it dimension.
18.   Glue onto page.
19.   Chipboard Preparation:
20.   FabScraps Angelic Christmas – Seasons Greetings chipboard DC61 003 – cut the Holly leaves from chipboard and set aside.
21.   Apply embossing ink to the chipboard words only and coat with white aged embossing powder.
22.   Treat with heat gun. 
23.   Glue to the paper strip near the left side. 
24.   Ink the holly chipboard piece lightly with olive green ink and lightly dab with some gesso for a frosty look.
25.   Glue under the “Seasons Greetings “ piece.
26.   Finishing Touches:
27.   Punch or die cut various sized snowflakes from FabScraps  Angelic Christmas Collection – Bauble Delight paper  C61 001 .
28.   Emboss  the center of each snowflake with white antique embossing powder.  Heat set and glue to the page.
29.   Add flowers under Santa image.
30.   Enjoy.


Tuesday, September 17, 2013

FabScraps Wild At Heart - Jolly Halloween


FabScraps – Wild At Heart – Jolly Halloween

FabScraps newest collection, Wild At Heart, is chock full of bold, strong colors.  Halloween  is also filled with bold strong colors so why not pair the two up?   I used a piece of Wild At Heart, Skating Wild 1 paper as my inspiration.  It is red, it is bright and it looks amazing with a touch of black.  

The vintage photo I selected came from Graphics Fairy.  It is an old postcard that has 1909 on it.  I thought the blue background was a nice compliment to the robust red. 

I finger painted some acrylics on the page - red, yellow, terracotta then I took a paper towel and blotted them together to blend a little. 

After the paint was dry, I stamped some big flourishes and then topped the flourishes with Prima crystal flourishes for added dimension. 

Below are easy instructions on how I created this page. 

FabScraps Wild At Heart Collection  is now available at the Flyuing Unicorns. 
Come and visit the FabScraps Facebook page and LIKE them here

Supplies:
FabScraps Metal Filigree frame
Prima Say It In Crystals -swirl Black 517311
Prima Flowers -Anna Marie collection - 570668
Prima Vines - Holiday Lights Glitter Spray - Black Ivy 533816
Inkadinkado -Flower Flourish Stamp 60-60047
Dylusions Lemon Zest Spray
Prima Say It In Pearls -SIIS and Crystal Center 531027
Tattered Angels Screen Print - "Notes From the Garden" -TAT09SPGSNG
Ranger Archival Ink - Black
Gold Foil Doily

Instructions:
For This Project You Will Need
  • FabScraps Papers – Wild At Heart  Collection –Skating Wild 1  C59 003 (12in x12in)  
  • FabScraps Papers – Metal Filigree Piece
  • Gold  Foil Doily
  • Large Flourish Stamp
  • Black Ink
  • Black Crystal Flourish
  • Acrylic paint – orange, yellow, red
  • Black vine
  • Gold leaf wax rub or gold paint
  • Flowers
  • Gold pearl
Instructions
1.     Background  Paper Preparation:
2.     Start with FabScraps  Wild at Heart Collection –Skating Wild 1 paper  C59 003  – this will be the background base paper.
3.     Using brush, fingers or foam pad, paint some orange, yellow and red acrylic paint on the page near the right hand side  (covering about 1/3 of the paper)  and then paint a smaller section on the left edge of the paper to be used as an edge accent. Use a paper towel to blot the colors together. 
4.     When paint is dry, add some flourish stamping to the page so that the flourishes peek out from behind the photo – when the photo is set in place.
5.     Stamp some smaller flourishes in the left bottom corner where the accent paint is.
6.     Glue a gold foil doily to the center of the page to be used as a photo mat. You can also use a paper doily painted gold.
7.     Glue the photo in place over the gold doily
8.     Embellishment Preparation:
9.     Add some black crystal flourishes to the page to enhance the black stamped flourishes and to give the page some dimension.. 
10.   Add black floral vines.
11.   Paint the FabScraps Metal Filigree frame with gold paint or gold leaf wax rub and glue to the bottom left corner.
12.  Finishing Touches:
13.   Accent  page with flowers
14.   Glue a pearl on the top of the FabScraps metal filigree  frame.

15.   Enjoy. 

Saturday, September 14, 2013

CSI -Colors Stories Inspiration Case File 89 and Flying Unicorns


The Flying Unicorns are teaming up with CSI - Colors Stories Inspiration to solve some cases as Special Investigators.  What fun!

This was created for CSI - Colors Stories , Inspiration for case file #89.  It was made using Flying Unicorns September Kit of the Month - 50 Shades of Summer.

CSI  is very interesting in that you need to use all the 5 colors is the palette.  The you need to chose two elements from the evidence list to incorporate, and one item from the testimony list to use as a journaling point.

My evidence on this layout is the use of  alphabets and a few different alphabets as well.  Also some dots that I stamped.
My testimony is the journaling  of the alphabet using the word TWIN.  This little darling has a twin sister - she does not like Cousin Jen's camera.


As you guessed, this is a photo I took of my cousin  a few years ago. Gosh those eyes are so adorable.


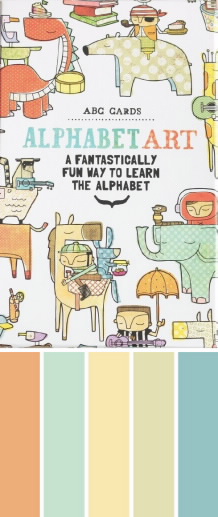
Here is the color palette:


The blue background of the layout was made with  blue gelatos and gel medium.   I put a layer of gel medium down on my paper then rub the blue gelato over it.  I blend with my fingertips.

Here is the list of evidence that I selected from:
·     animal accents
·     polka dots
·     stripes
·     straw/rolled paper and/or use a straw to blow paint/ink
·     brackets
·     two different alphabets
·     dotted lines
·     use alphabets as part of your design
·     book pages
·     scallops
·     musical elements
·     flag
·     triangles


Supplies:
13Arts paper collection  Hair in the Wind
Kaisercraft Alphabet stamp CS887
Prima Clear Stamp 960902
Black Range Archival  Ink
Dry Wall joint tape
Yellow card stock
EK Success Swiss Cheese Punch
Stampendous Chipboard Letters