My Fancy Purple Mood (with easy DIY instructions)
Purple is an emotional color for me.
Purple was my grandmother's favorite color and it reminds me of her. It's a royal, regal, warm color and conjures feelings of grace and nostalgia in my mind. It's a color that makes me smile.
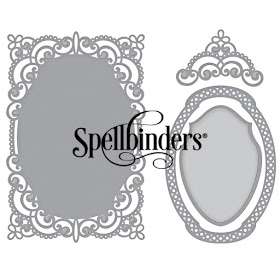
Usually when I work with purple, the project will most likely tend toward being delicate or graceful. Fortunately, I have the perfect Spellbinders dies to match my purple mood:
I am so thrilled to be one of Spellbinders Spellbloggers for 2018 providing me an opportunity to work with these divine and amazing products. Thanks Spellbinders!!!
This is my first card, created using Spellbinders Amazing Paper Grace Collection designed by Becca Feeken for Spellbinders as part of the Chantilly Lace collection.
The die has a super long name...
Don't let that distract you from the true beauty.
When I hear super long names, I think royalty. Those names go on and on...well this is similar. Pure papercrafting royalty as you can see below.
Here is my card close up. If you scroll on down through the post, I have a step by step showing how this was made.
Easy DIY Instructions:
My paper choice for these cards is Maja Design - Fika collection. This line has a full rich assortment of purples and chocolates that will make a purple paper lover drool.
Step 1. Cut one die to be used as the background for the card. Set aside. Simple - no fancy techniques here. Let the gorgeous die do the work.
Step 2. Fold a piece of patterned paper so that it will fit the rectangle die included in the Chemise Layering Frame die set (approx. 2.80 x 4.85 in). Place the die on the paper fold so that it overhangs a tiny bit.
This will give you a rectangle that is cut to the size you need, and one that still has a fold.
Step 3. I find it easier to cut this folded piece when the die is taped in place. Note: use tape that will come off without ripping the paper.
Step 4. Time to start layering. Select your layers and cut using the rectangle die.
But wait...now you have 3 pieces for laying that are all the same size. My solution is to trim the layers to size so they layer and nest nicely when assembled:
*trim about an 1/8in from the ivory cardstock layer
* trim about 1/4in from the floral paper layer
In my opinion it is easier to start with the same size and trim to size. This way you know the base layer (the brown piece) will fit (nest inside) perfectly on top of the decorative frame die.
Step 5. I added gingham ribbon to my card by lacing it through the medallion die piece. I cut a slit in the card using a craft knife and pulled the ribbon through the card.
This gussies up the inside of the card with a cute surprise when opened.
See how beautiful the inside of the card is? What a fun detail.
*******Card Number Two*******
This is the second card made while in my purple mood.
I grabbed a different die, also from Spellbinders Amazing Paper Grace Collection designed by Becca Feeken .
This Chantilly Lace die also has a long name but we've already discussed the reason for the long name...royalty has long names.
Thank you for stopping here and thank you to Spellbinders for inviting me to be part of the Spellblogger Team. Such a wonderful opportunity to share the best dies in the world.
Where to shop?
You can shop for all your Spellbinders dies right here .
You can click here for the Amazing Paper Grace Collection.
You can shop for Maja Design papers right here.


No comments:
Post a Comment