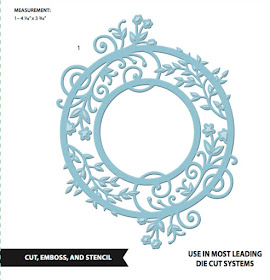
I'm having a great time with my stamps and dies from JustRite. I love making shaker cards and thought the JustRite Garden Circles Die would make a sensational shaker.
If you scroll on down the post, I share my easy DIY steps on how I created this shaker card featuring JustRite Papercrafts dies and stamps. I also have a few tips to help make the shaker process as easy as possible.
Step 1. First step is to prepare my base card with the background papers and matting. I also like to ink the edges of my paper with a vintage brown ink. I found the easiest way to cut background mat layers is by using JustRite Cardfront Basic Dies - DIE-05047 - which was made just for this task.
After stamping, I cut a circle from fun foam to be used for the window of the shaker card.
Helpful hints:
- Stamp first and make sure your stamp is very dry before you add your foam.
- I used tan colored fun foam. Fun foam comes in a variety of colors and I picked a nice neutral to make the foam less obvious and less obtrusive to the person viewing the card.
- When cutting the foam, use the die as your template so you know how big you need to cut your circle. Do not worry about cutting the perfect foam circle. It will be covered up and no one will see it.
- When gluing the foam, grab a good strong durable glue that is suitable for adhering foam. As shaker cards goes, there is nothing worse than giving a lovely card that breaks apart making the contents spill on the floor. A card that makes someone pull out the vacuum is not a happy fun card! hahahaahaha. Cards that make people work are not appreciated.
I do use micro beads but with micro beads you need to make sure you have a really perfect seal around the shaker window. I speak from experience here. LOL.... Once again, that's where using good strong that can adhere foam is advisable.
Step 4. Cut the gorgeous JustRite Garden Circles Die
Step 5. Cut an acrylic circle to fit the die. Don't have any acrylic? This is what I do....I eat the rest of the baked goods I bought for the family - this one happens to be the beloved cheese danish. Just wash and dry and instantly I have acrylic.
Look at the top of the container....all that lovely usable acrylic begging to become a shaker card.
The possibilities are endless - baked goods, fresh fruit and veggies, packaging from your crafts and crafting flowers....search the house high and low.
Step 6. Add your acrylic circle underneath the JustRite Garden Circles Die . Adhere the acrylic circle to the die with your strong glue.
You're done!!!!
Here is the finished card once more.
Visit JustRite Papercrafts today for the current release as well as many other dies, stamps and crafting products.
Thanks for stopping here!!!!
JustRite - Floral Trio One Dies
Prima Tales Of You & Me Collection -Frank Garcia 6x6
Gingham trim
Fun Foam
Clear Acrylic
Martha Stewart Doily Lace Edge punch


Lovely card, with great explanation.
ReplyDeleteSue
I love your card and love to "upcycle" plastic too!! Great inspiration!!
ReplyDelete