Pages

Wednesday, April 24, 2019

Create a Pop and Twist Card with Spellbinders and Maja Design


Easy Pop and Twist Cards

Do you get that happy, satisfied feeling when you are sitting at your craft table pairing your favorite products?  I sure do.

Today I'd like to share a fun pop and twist card crafted by pairing Maja Design papers with Spellbinders dies designed by Becca Feeken.   

Spellbinders and Becca Feeken have teamed together to present a monthly die club featuring the popular Amazing Paper Grace die designs - APG-Amazing Paper Grace Die of the Month.  These dies are only available through the club.  

I love cards that are surprises. This card is a total surprise.  When opened it pops out to present a beautiful summer garden gate. 

Here is the die set for the Month of April from Spellbinders.  It has several embellishing dies to help gussy up the card in a variety of ways: flowers, a decorative panels, word dies that say "Thank You" and "Hello', "friend".

Amazing Paper Grace Die of the Month Membership
Becca Feeken  has provided instructions on how to assemble the APG Die this Month into a cool twist card.   
This is my interpretation of the die. 


 Here are the papers used from the Maja Design Summertime collection: 
 Light Scarlet
It's Always the Best
Smell the Roses

While the inside of the card is the real "show-stopper", the outside is special and packed with beauty as well highlighting the delicate images found within the Summertime collection.  

Thanks for stopping here.   Remember Summer is almost here!


Where to shop? 


Amazing Paper Grace Die of the Month Membership
Amazing Paper Grace Die of the Month Membership - 

from: Spellbinders / FSJ

*********************************************************************************


                     Tool 'n One
                   Tool 'n One - $14.99

            from: Spellbinders / FSJ


*********************************************************************************

Tuesday, April 23, 2019

Shaker Cards for Baby - Creative Embellishments


I've been enjoying the new shaker card designs from Creative Embellishments .  
These chipboard shaker sets are unique and fun to make, fill, and give.  

I am absolutely obsessed with making shakers but I have to admit the part I hate most is cutting and fitting the acrylic piece - the most essential piece of the entire card.  

I'd save anything that had an acrylic package.  In fact, I'd even look for packages that had see through acrylic windows that would be perfect for transforming into shaker windows.  Oh the stack of acrylic pieces I have accumulated and hoarded over the years;  muffin containers, salad boxes,  cosmetics,  toy packaging, etc. 

Hoard no more!  Why?  Because Creative Embellishment shaker sets come with perfectly cut and sized acrylic pieces.  

Here are the chipboard sets used:
*********************************************************************************
Creative Embellishments - Shaker Set


*********************************************************************************
I kept the chipboard simple in both cards by painting the surfaces and edges with a light cream acrylic paint.   I did find that painting the edges creates a more finished look and softer look. 

I also find that painting the chipboard with a natural sea sponge is faster and eliminates streaking that can occur with paint brushes.  I did use a fine tipped brush for the edges. 


The papers used on the baby boy Onesie is also from Maya Design.  This collection is called "Summertime" and the specific papers are "Watch the Boats" and "Glittering Water".

               
I created the boy card for my niece who is having her first baby.  I added the word "Son"  - from the Family Words Chipboard Set for that extra little emotional tug at the heart strings - that "awe" moment.

It's simply painted with cream colored acrylic and a dab of light blue.

Wondering what to use for shaker filler? 
OK so now you have your shaker card made and you are ready to fill it.  Don't sit at your crafty desk and look around for little bits.  You have easy options!
Beads, Sequins, 

I filled with sequins and crystals from Buttons Galore - Sparkletz.  They have an assortment of colors and bits for the perfect filler.  
TIP:  Add your filler then use a good adhesive to seal the shaker with the pre-cut acrylic piece that comes in the kit.  I used Beacons 3-in-1glue because it dries clear and works well with a  variety of surfaces ( acrylics, plastics, wood, metal, fabric, canvas).


Thanks for stopping here.  

Where to Shop?
********************************************************************************

Creative Embellishments - Shaker Set


*********************************************************************************


*********************************************************************************

Thursday, April 18, 2019

Bright Cheery Cards - Spellbinders Card Club Extras for April 2019


DIY Celebrates the Girls and the Extras

Time to celebrate all the wonderful women in your life - mom, friends, sisters, nieces, granddaughters, aunts - whomever.  Spellbinders has a super easy way for you to let them know you care.  

This month the Spellbinders Card Club Kit is jammed packed with beautiful diecuts, dimensional stickers, and delicate touches - amazing embellishments and paper we call the "Extras" .

The cards in today's blog post were created using the "Extras". 

The kit comes packed with paper, cardstock, stickers, die cuts, stamps and even the adhesives you need.   In fact, this is what's included in April's kit:

Card Kit of the Month Membership
from: Spellbinders / FSJ  

Here are the cards I created with the Extras for April: These feature the die cuts, puffy dimensional stickers and stamps.


What are the Extras? FAQ's 
I've been asked several great questions regarding the Extras so let me provide some FAQ's on the Extras.  

1.  What do you mean by Extras?  I'm going to swap out the word Extra and replace it with the word embellishments or products.  Each month Spellbinders selects some products in the kit that can be purchased separately if you run out and would like more...paper pads, stickers, die cuts.  
      These would be extras.    Think about it this way...if you used up your supplies and wanted to buy more, then you'll need Extras. 

2.  If I order the club kit, do I also need to purchase the Extras?  The box will come packed with all the coordinating products for the month. Each box will have the die set, paper pad, and any accompanying embellishments available that month.  You do not need to purchase anything else.  Extras are optional and will be duplicates of products you already own. 

3.  Where can I purchase additional stickers and paper pads?  
Additional paper pads, stickers etc, are available while supplies last.  Here is the shopping 

4. I do not have a Spellbinders Card Club membership.  Can I still buy some of the beautiful Extras? Absolutely! The products are offered for sale in the Spellbinders store while supplies last.  Supplies are limited so hurry to grab your goodies. 

5. Can I purchase last months kit? The supplies are limited and you can find all available club kits  here:   Past Club Kits - Limited Offer.   Supplies are limited so hurry to grab your goodies.

6. Are the Extras the same each month? The supplies for sale individually (Extras) change each month just as the embellishments and products change.  Stickers may be featured one month and die cuts offered the following month.  Variety is what makes life fun and surprising.  

*********************************************************************************

*********************************************************************************


You can find information on the card club right here:  Spellbinders Card Club information


Thanks for stopping here.
Spellbinders even invites you to share your creations with them on Instagram (#SpellbindersClubKits)
or by uploading them to the Spellbinders club gallery


Shop Here
*********************************************************************
Card Kit of the Month Extras - Paper

Paper Pad -Card Kit of the Month Extras Apr-19

Night Out Die Cut Shapes Set - Card Kit of the Month Extras

*********************************************************************************
Past Club Kits - Limited Offer


 Spellbinders Card Kit Extras


*********************************************************************************
                                           
Night Out Clear Stamp Set - Card Kit of the Month Extras

Wednesday, April 17, 2019

Create Fun Easter Shaker Cards with Chipboard


Happy Easter everyone.  Jennifer Snyder here sharing my Easter shaker cards made with the new shaker chipboard sets from Creative Embellishments.  

Do you love shaker cards? I must say I am absolutely obsessed with making them.    They are always fun to make, fun to receive and create smile.  Nothing like knowing you are making a card that will bring joy to someone.  

Creative Embellishments also has a fabulous variety of new shaker card designs.  The sets come with a pre-cut and perfectly sized acrylic piece to cover the shaker.  That's really important because the acrylic piece is the most critical and difficult part to create when making a shaker at home.   

I used the Bunny and the Egg shapes for my cards today. 

*********************************************************************************
Creative Embellishments - Shaker Set
Creative Embellishments - Egg Shaker Set


*********************************************************************************


This is a close up of the bunny shaker card.  I painted all chipboard pieces with ivory acrylic paint, and added some pink cardstock for bunny ears and nose. 

Wondering what to use for shaker filler? 
OK so now you have your shaker card made and you are ready to fill it.  Don't sit at your crafty desk and look around for little bits.  You have easy options!  

I filled with sequins and crystals from Buttons Galore - Sparkletz.  They have an assortment of colors and bits for the perfect filler.  A second option is using wood veneer pieces from Creative Embellishments (I used these in the egg shaker card - keep scrolling down).  

TIP:  Add your filler then use a good adhesive to seal the shaker with the pre-cut acrylic piece that comes in the kit.  I used Beacons 3-in-1glue because it dries clear and works well with a  variety of surfaces ( acrylics, plastics, wood, metal, fabric, canvas).

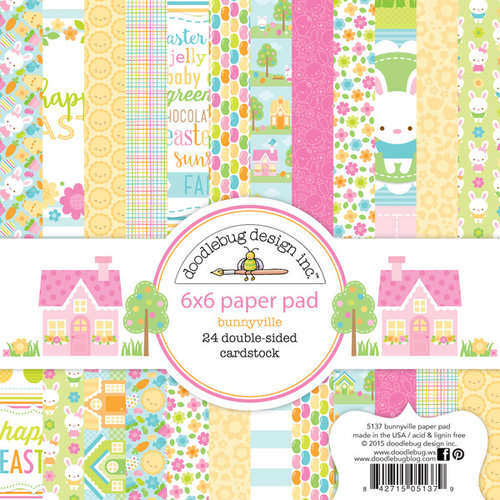
The paper used on these cards is Doodlebug Design - Bunnyville 6x6 collection. 
Totally adorable patterns for Easter. 

Doodlebug Design - Bunnyville Collection - 6 x 6 Paper Pad
from: Scrapbook.com

Here is the second card created.  This is the traditional egg form painted with acrylic paints, then trimmed on the inside with lace and patterned paper for some egg-stra fancy embellishing.  

I filled the egg card with adorable wood veneer pieces from Creative Embellishments.  They are perfectly sized to use as shaker card filler.  

I simply painted with acrylic paints to look like traditional Easter candy - marshmallow peeps and jelly beans.  
Creative Embellishments -Easter Candy - Wood Veneer


Thanks for stopping here today.  Happy Easter!


Where to Shop?
********************************************************************************

Creative Embellishments - Shaker Set
Creative Embellishments - Egg Shaker Set


*********************************************************************************

Buttons Galore - Sparkletz - Sailor Sky (Shaker Card Fillers)
Creative Embellishments -Easter Candy - Wood Veneer

*********************************************************************************


Doodlebug Design - Bunnyville Collection - 6 x 6 Paper Pad

from: Scrapbook.com